Setting up an OpenVPN connection on a OpenWRT router
The following instructions will guide you through a configuration of an OpenVPN connection on a OpenWRT compatible router. This is the recommened connection for OpenWRT compatible routers connecting to the VPNUK service. There are many routers compatible with OpenWRT, please check the router database on the OpenWRT website for more information.
Prerequisites: Setting up the OpenWRT Router
Download and install OpenWRT firmware onto your router before commencing.
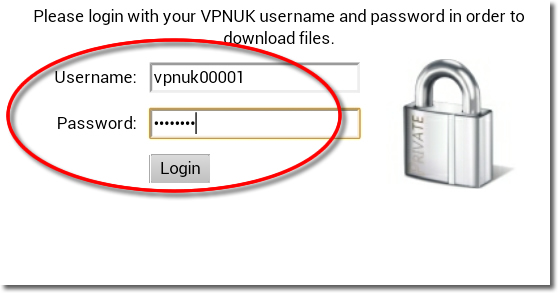
1. Start Configuration
Click Here to login and configure the OpenVPN connection. Our system will automatically generate your Open-WRT configuration file and can email the file to you, you also have the option to download the configuration manually.
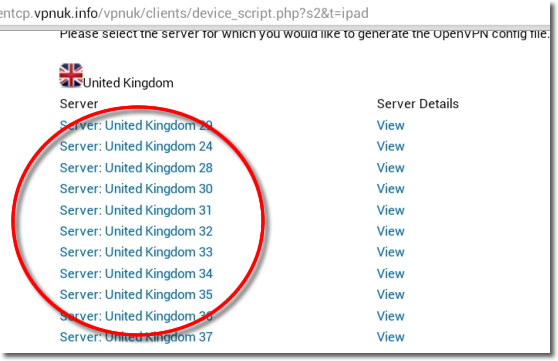
2. Choose a Server
If your account is on the Shared IP platform, you are welcome to choose any or as many servers as you like. If you have a Dedicated IP account your server details will be automatically selected for you.
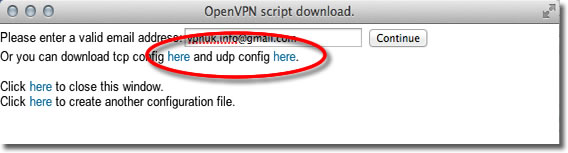
3. Get the config files
Click onto the download option, you have the option to download the files as UDP or TCP. If you prefer to have the files sent to your inbox, confirm your email address then click onto the ‘Continue’ button, this will instruct our server to email your config file to you. The email will arrive after a couple of minutes.
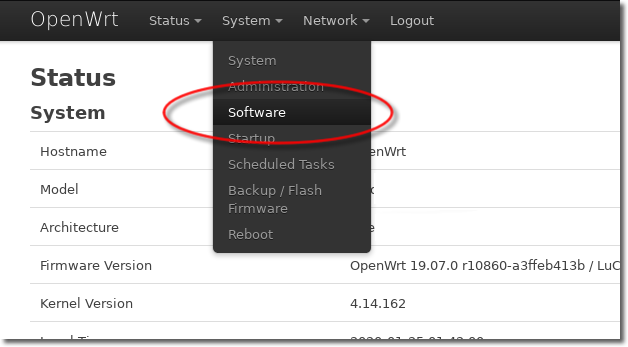
4. OpenWRT Software
Log in to your OpenWRT router and go to ‘System’ > ‘Software’.
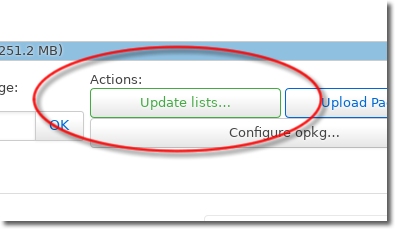
5. Update Lists
Click onto the ‘Update lists’ button.
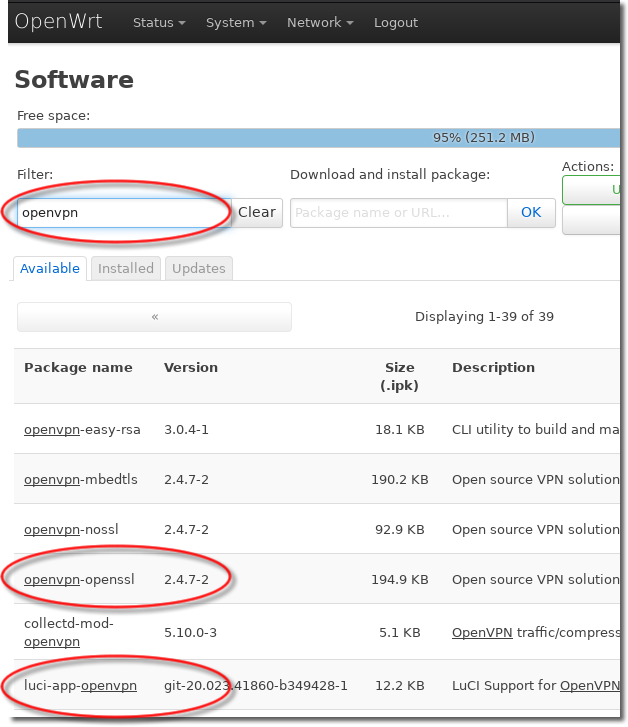
6. Search for ‘OpenVPN’
Type ‘openvpn’ in the search bar, and install the following packages:
openvpn-openssl
luci-app-openvpn
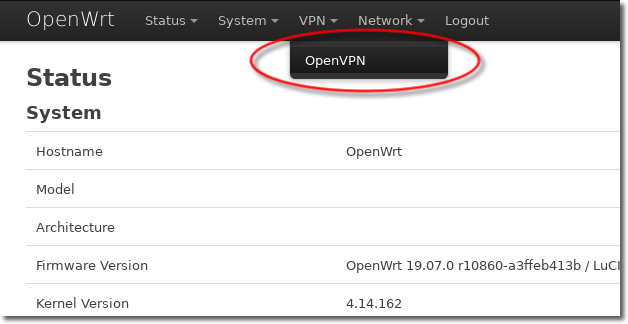
7. Refresh
Logout of OpenWRT and then login to get the UI updated with OpenVPN, then go to ‘VPN’ > ‘OpenVPN’.
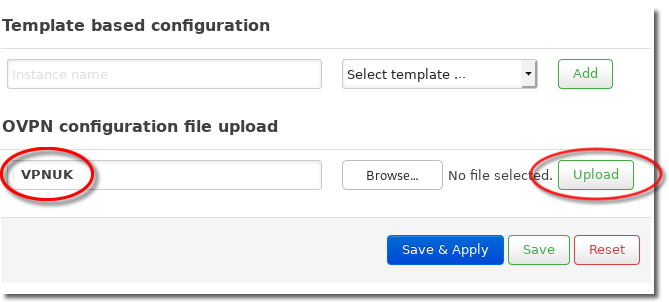
8. Upload Configuration
Go to ‘OVPN configuration file upload’ type ‘VPNUK’ as the name for this OpenVPN configuration into the ‘Instance Name’ field, then click onto the ‘Browse’ button and select the ‘VPNUK configuration file’ you downloaded or had emailed to you earlier, then click ‘Upload’.
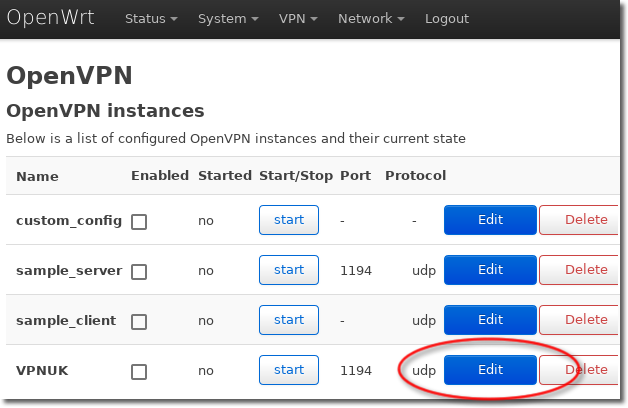
9. Edit Instance
Refresh the page and go to the ‘VPNUK’ connection from ‘OpenVPN instances’ and click on to the ‘Edit’ button.
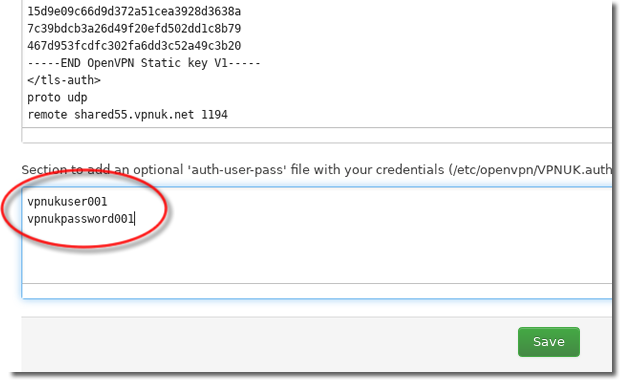
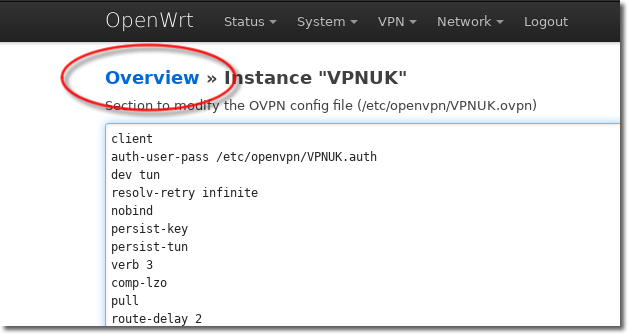
10. Enter Login Details
Scroll down to the ‘Section to add an optional auth-user-pass’, and add your VPNUK login credentials (login username and password), each on a separate line.
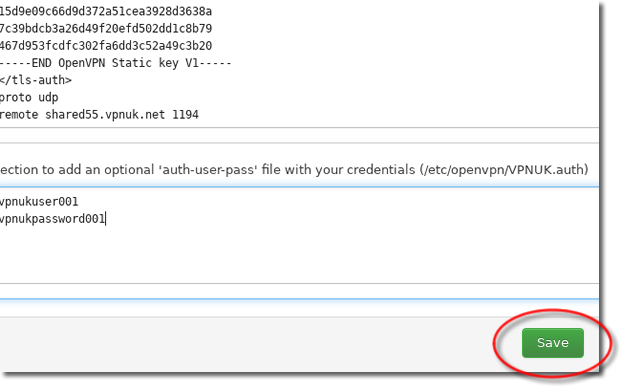
11. Save Configuration
Go to the bottom of the page and click onto the ‘Save’ button.
12. Return to Overview
Go to the top of the page and click onto ‘Overview’.
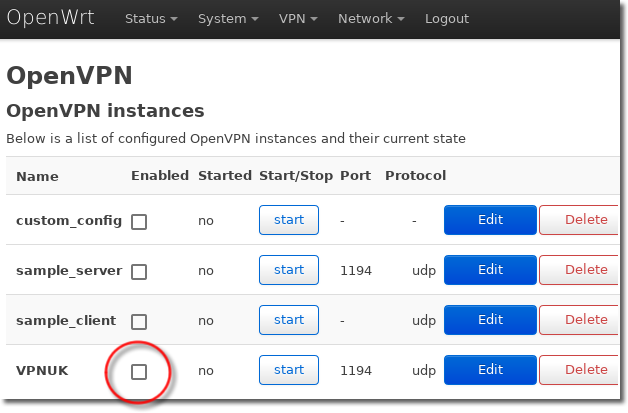
13. Enable VPNUK
Place a check into the ‘Enabled’ checkbox for the VPNUK connection.
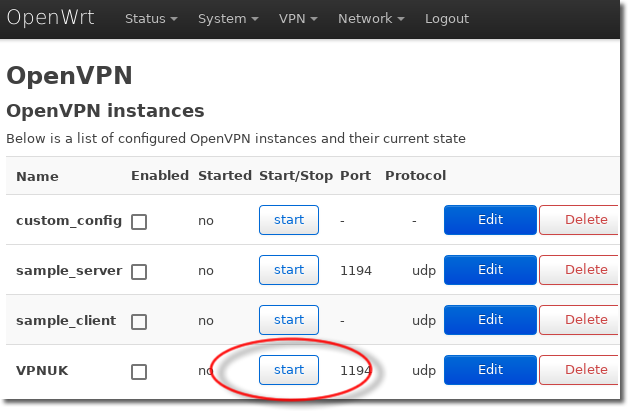
14. Start VPNUK
Click onto the ‘Start’ button to connect to VPNUK.
15. Save & Apply
Click onto the ‘Save & Apply’ button.

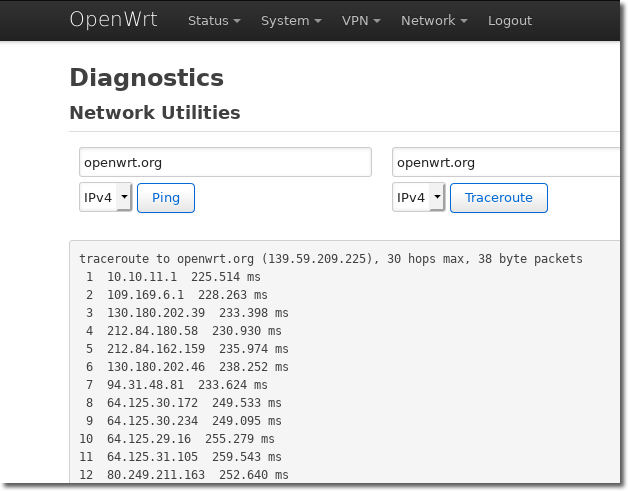
16. Connected!
You can check the connection is working by running a ping or traceroute to any website. You can do this from ‘Network > Diagnostics’.