Setting up the VPNUK App on macOS 12 Monterey or newer.
Three Protocols. One App.
Choose the protocol that suits your situation:
• WireGuard: The fastest modern VPN protocol. Your config is generated fresh on every connection, so there are no stale keys and no manual setup.
• OpenVPN: The battle-tested standard trusted by enterprises and privacy advocates for over two decades. Includes Obfuscation for protection against deep-packet inspection on heavily filtered networks.
• IKEv2: Uses the iOS built-in VPN client for a seamless, native experience.
You can log in with your VPN username and password — found in the Members Area under VPNUK Account Details or your User Account (members area) credentials. The VPNUK App for macOS allows you to login with either set of credentials, if you login with your User Account credentials our API will automatically load your account settings.
Download the VPNUK App
Open the App Store on your Mac and search for VPNUK. Download and install the official Tesflight app.
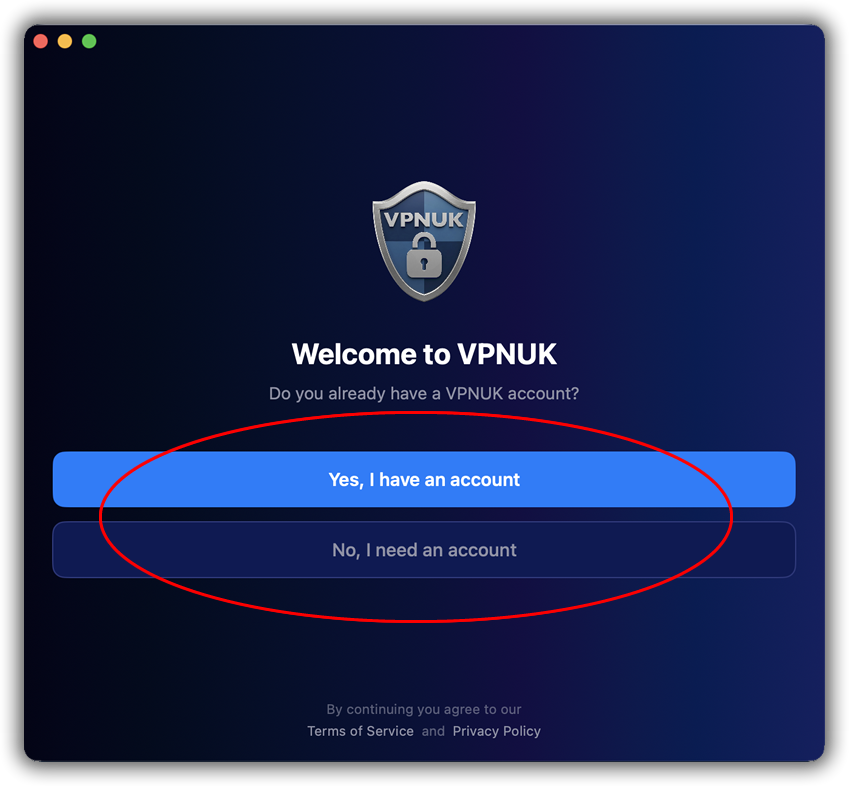
Onboarding
Open the app and select Yes, I have an account if you already have a VPNUK account, or No, I need an account if you do not have a VPNUK account.
Existing VPNUK Accounts - Creating a Connection Profile
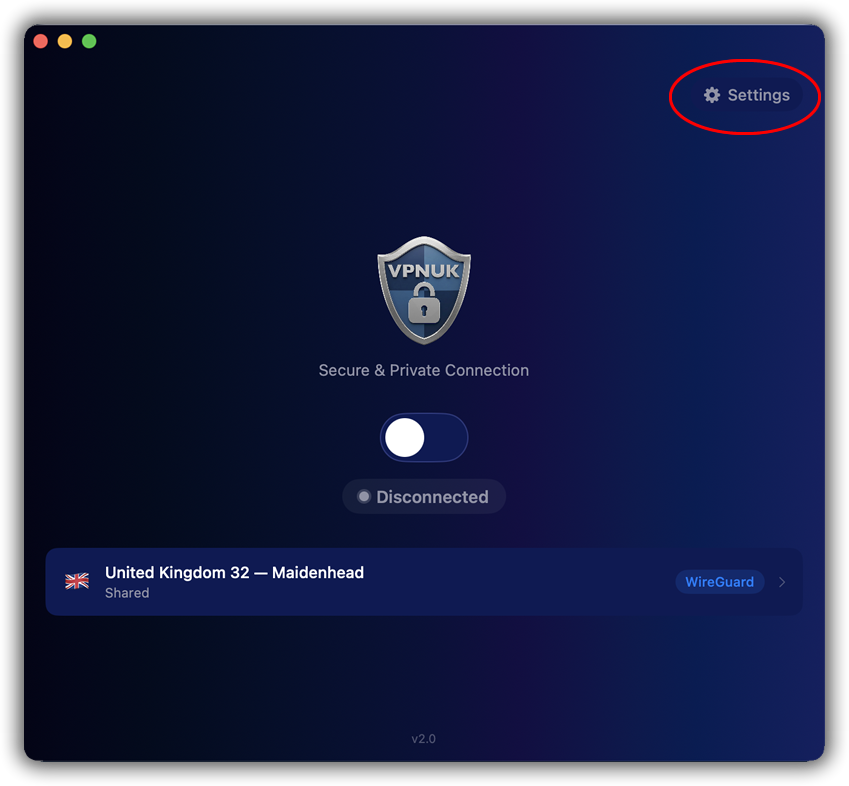
Settings
Before ytou can connect to the VPNUK service you need to configure the conection. You will need you VPN Login Credentials or your User Account crdentials. Once you have them, go to Settings.
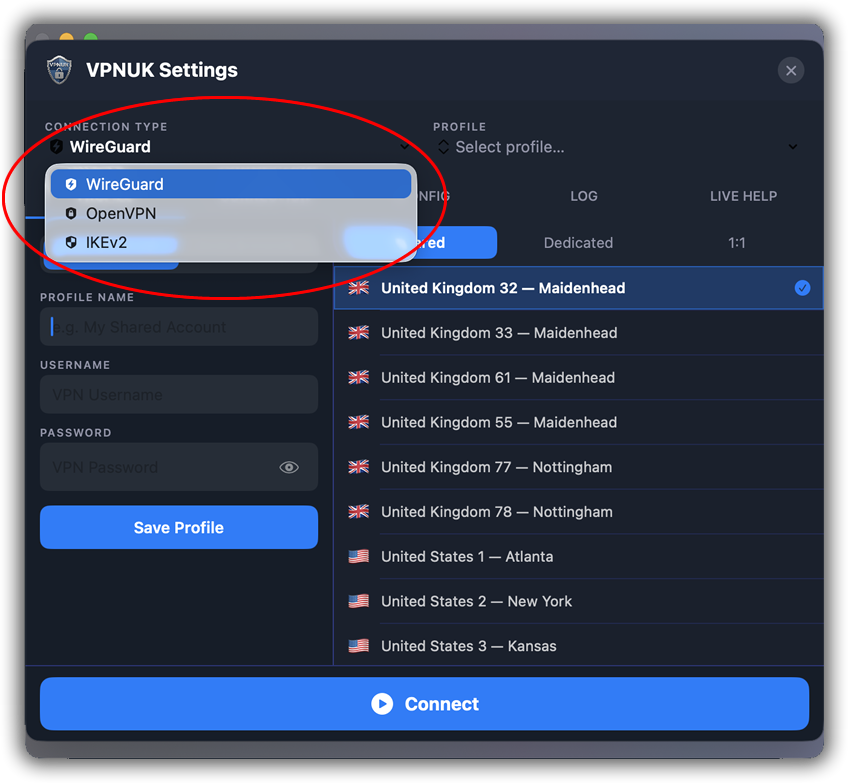
Connection Type
Click onto the Connection Type dropdown, you have the options of WireGuard, OpenVPN or IKEv2 connections.
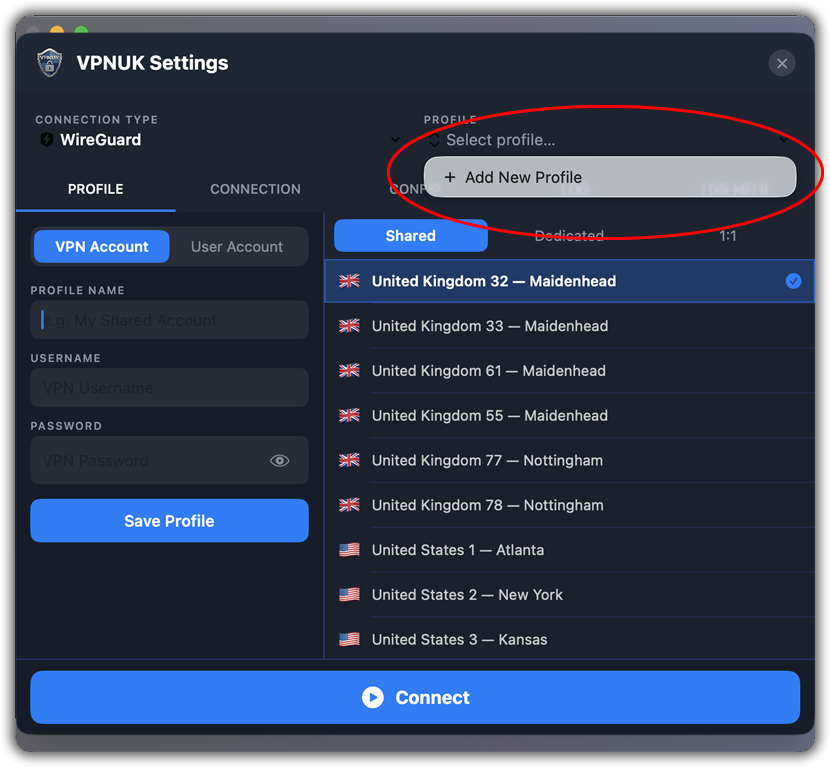
Add New Profile
Click onto the Profile selection and in the dropdown select + Add New Profile
Connection Method
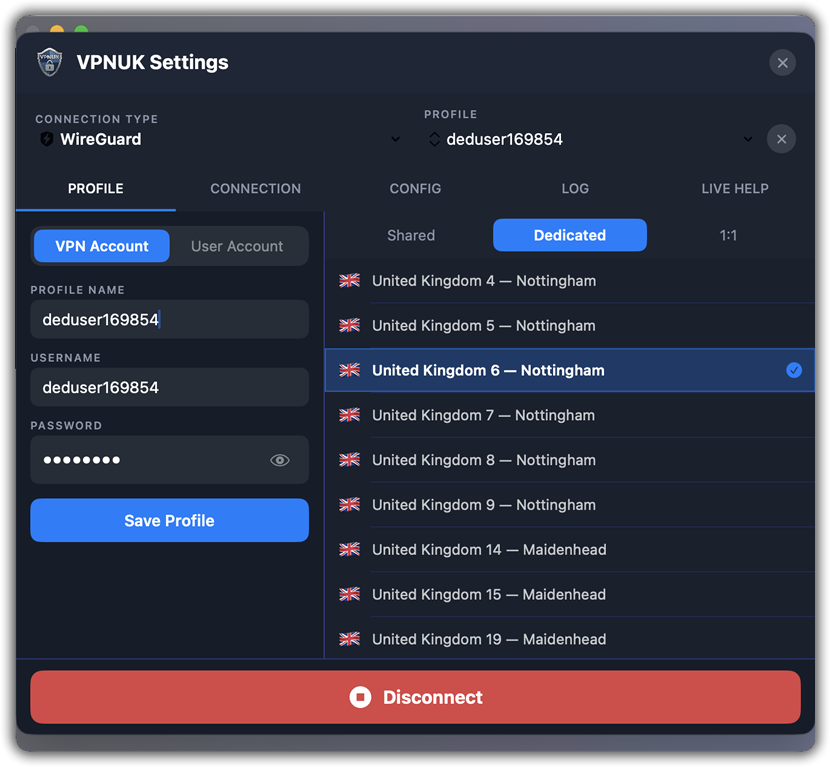
The following guide will create a VPN Account connection, select VPN Account then enter any name for the profile, followed by your VPN Username and VPN Password
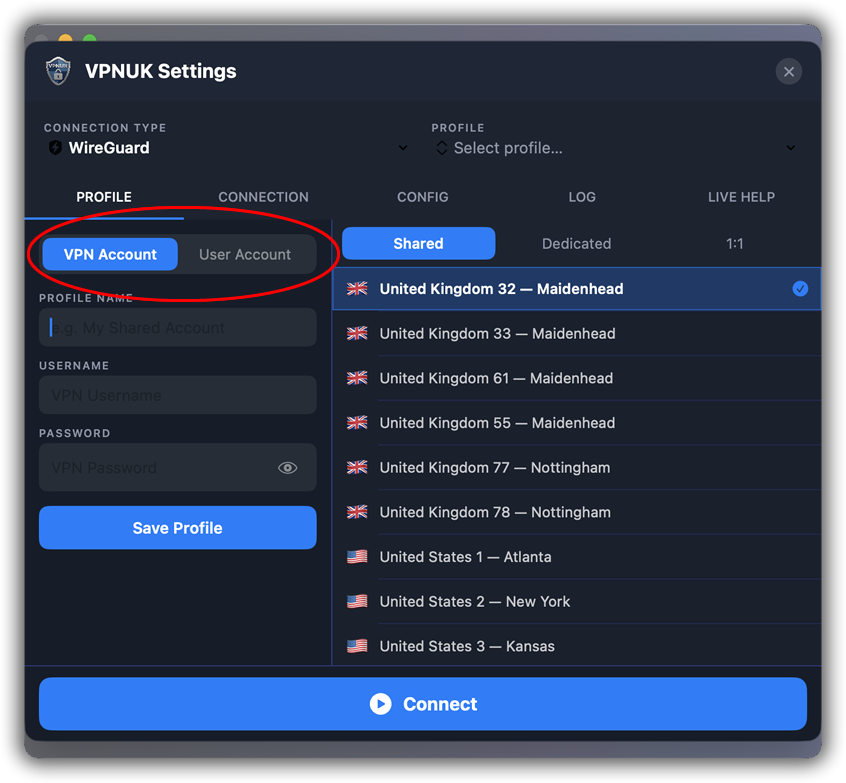
Select Server
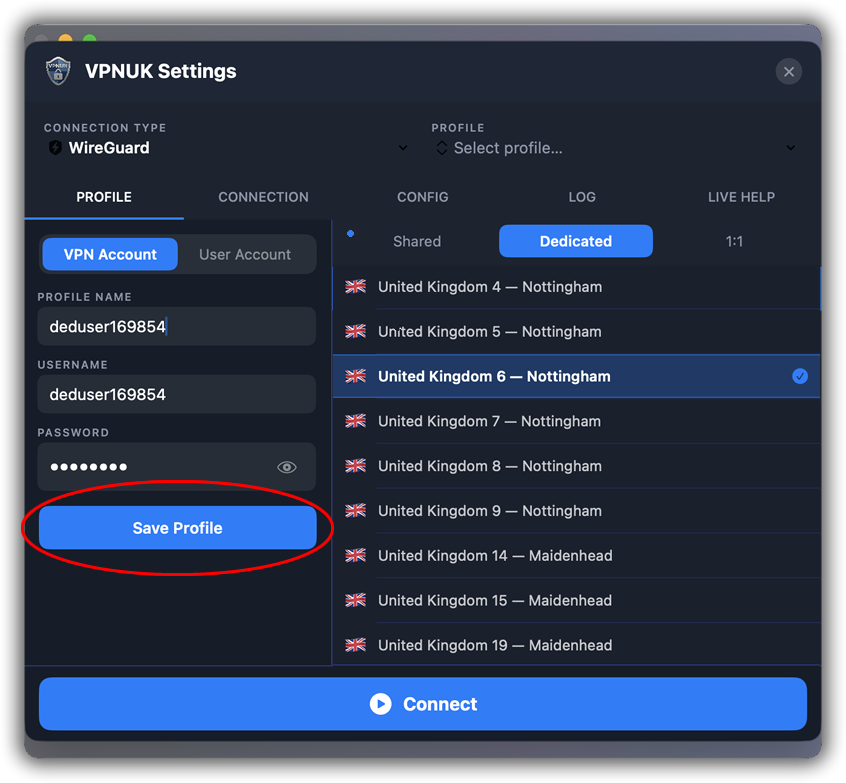
Select your account type and choose your server. If you have a shared IP account, you can select any Shared IP server. If you have a Dedicated IP or 1:1 Dedicated IP account, you must select the server that your IP is allocated to. You can also select any Shared IP server.
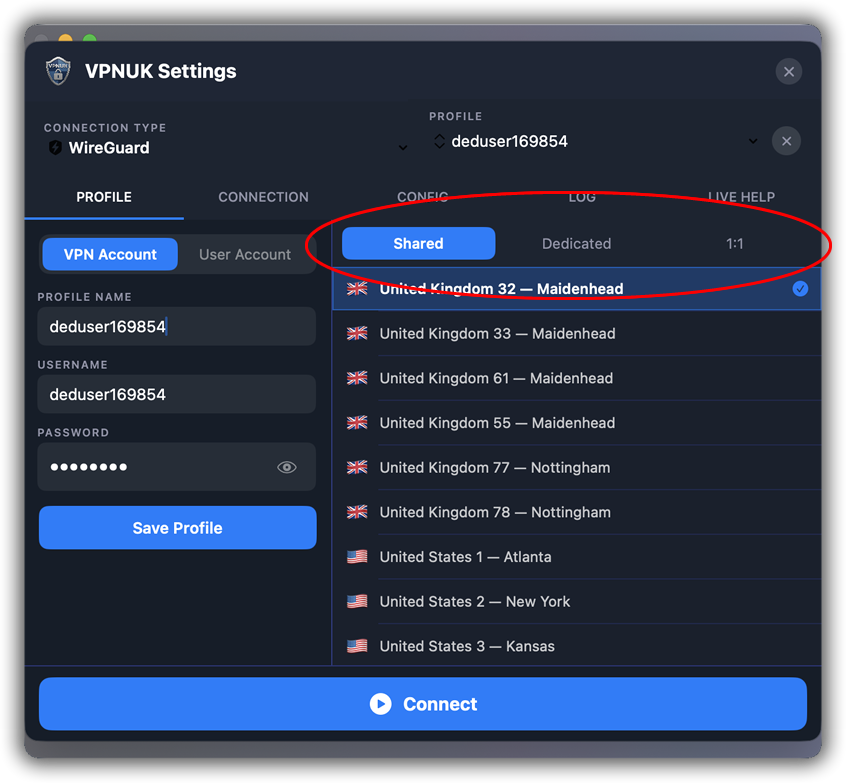
Save Profile
Your Configuration is now Complete, you can click onto Save Profile
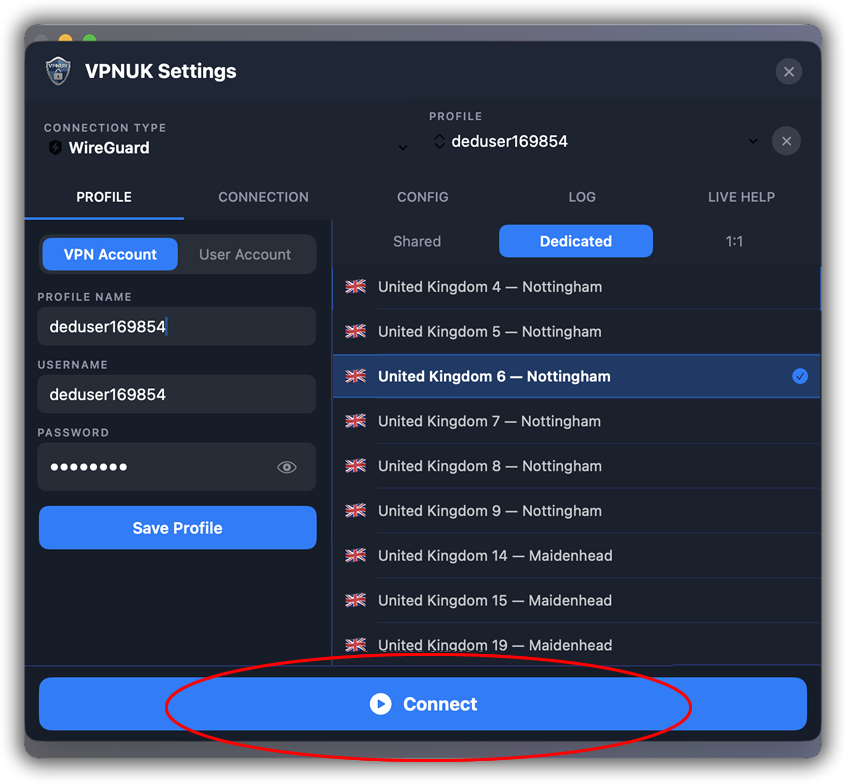
Connect the VPN
You can now click onto the Connect button to connect the VPN.
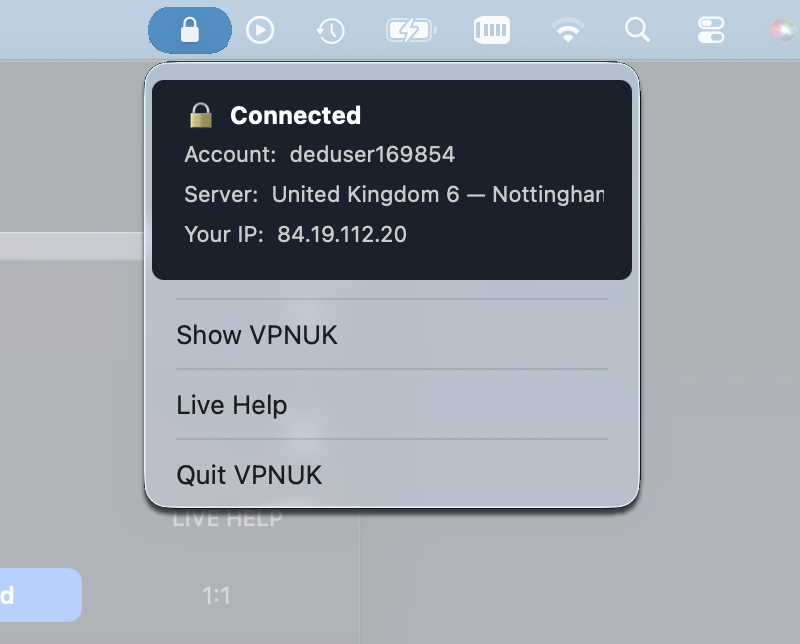
Connected!
Thats It, your VPN shuld now be connected.
VPNUK Icon
Your VPNUK icon in the taskbar should now show you your connection status. You can use the taskbar to bring up the app.
Existing VPNUK Accounts - Creating an API Connection Profile
Connection Method
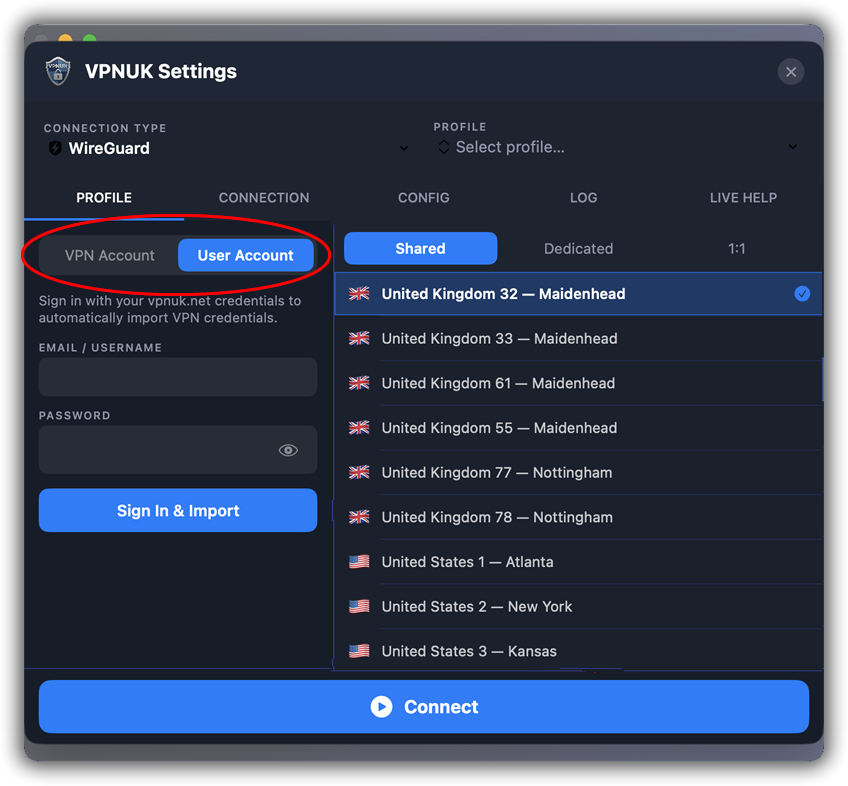
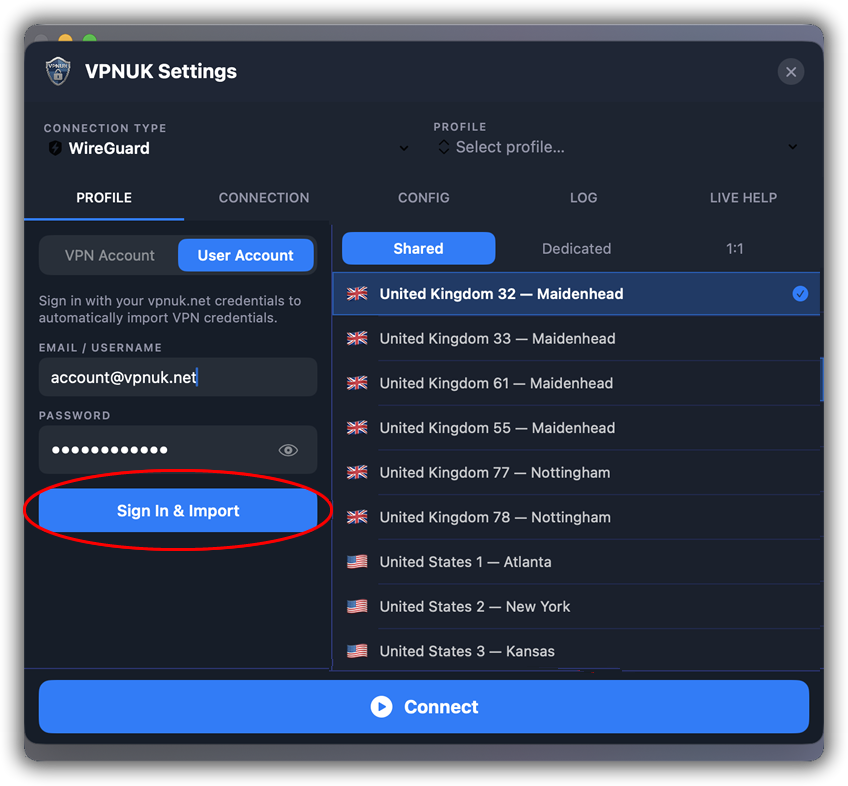
The following guide will create a User Account connection thrugh the VPNUK Api, select User Account then enter your resitered email address and user password. These are the same details you use to access the members area, you would have created the user account when signing up t the VPNUK service.
Sign In
Click onto the Sign in & Import button to sign in to your user account.
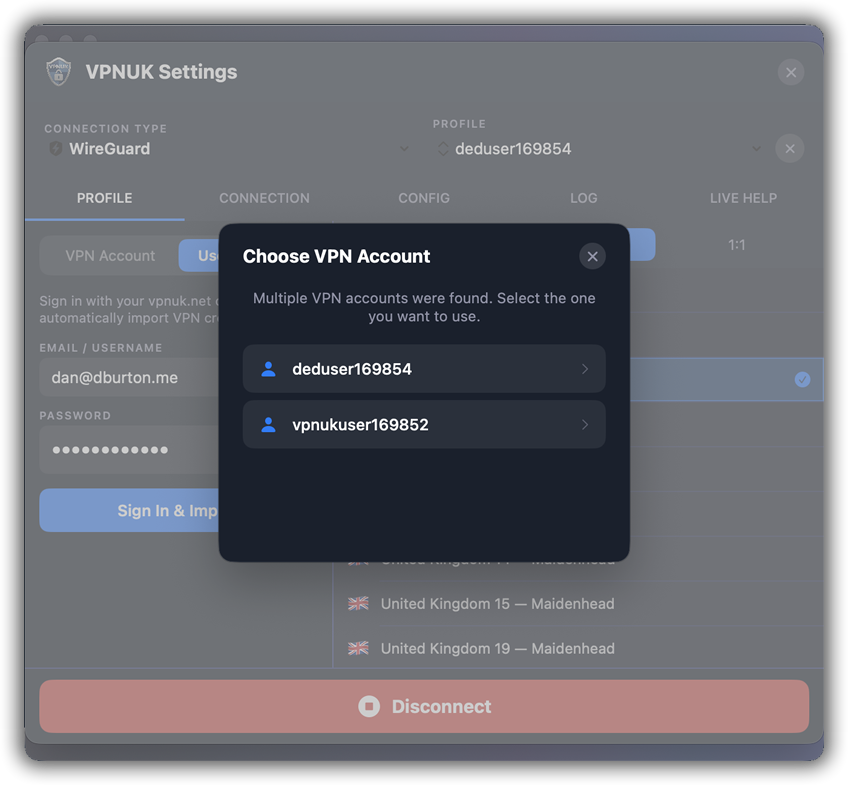
Sielect Subsciption
The API will display your subscription(s). Select the subscription you would like to import and connect to.
Connect the VPN
You can now click onto the Connect button to connect the VPN.
Connected!
Thats It, your VPN shuld now be connected.
VPNUK Icon
Your VPNUK icon in the taskbar should now show you your connection status. You can use the taskbar to bring up the app.
Troubleshooting
Disable IPv6
Go to Terminal (Finder → Applications → Utilities → Terminal) and run:
sudo networksetup -setv6off Wi-Fi
sudo networksetup -setv6off Ethernet
Still need help? Our support team is available 24/7. Contact us here and we will get you connected.