Setting up PPTP on DD-WRT compatible routers.
IMPORTANT NOTICE: Setting up DD-WRT on a compatible router is not for novice users, this setup does require a certain amount of experience and knowledge of how internal networks operate. It is not possible for VPNUK to assist in the flashing of routers or the installation of DD-WRT firmware. It is also not possible for VPNUK to assist in the setup of the VPNUK service, nor can we be held responsible for damage caused by clients configuring uncompatible routers or flashing incorrect firmware. If you choose to setup your VPNUK connection over DD-WRT we have very limited support available and we are unable to assist remotely or through our Live Help service. Please only install official DD-WRT firmware from the DD-WRT website onto compatible routers. Before you attempt to configure your router please setup an OpenVPN connection on your computer to ensure the account is working.
If you do choose to configure your connection through DD-WRT, please note, that it is still largely unsupported and can be problematic. If you have any problems we only offer basic troubleshooting assistance through our ticketing system, we also have a troubleshooter at the bottom of this page. You should be prepared to lose internet connectivity and be ready and know how to return the router to it’s default settings.
IMPORTANT: A 200MHz processor (most routers’ processors) won’t reach an optimal speed for some media related services when using PPTP. We strongly recommend all connections to the VPNUK servers over DD-WRT use the OpenVPN setup, its fast, stable and very secure.
1. Version Check
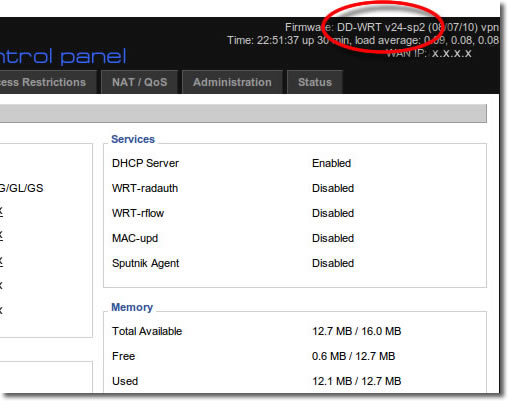
Login to your home router with DD-WRT version v24sp2 or higher on it.
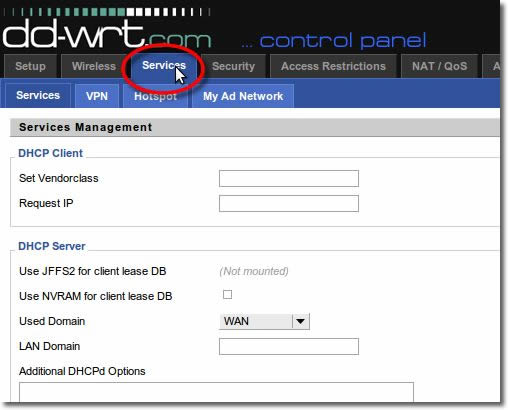
2. Services
Click on the ‘Services’ tab
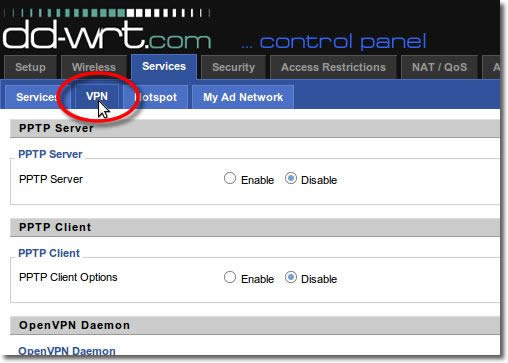
3. Go to VPN
Click on the ‘VPN’ tab in the ‘Services’ sub menu.
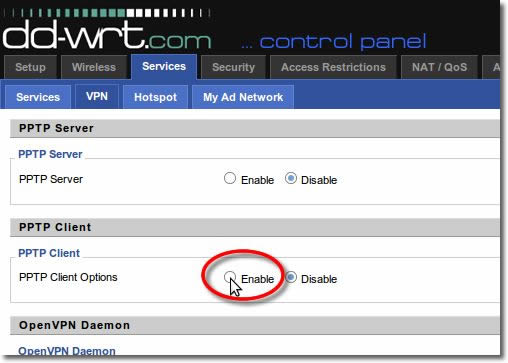
4. Enable PPTP
In the ‘PPTP Client Options click onto ‘Enable’
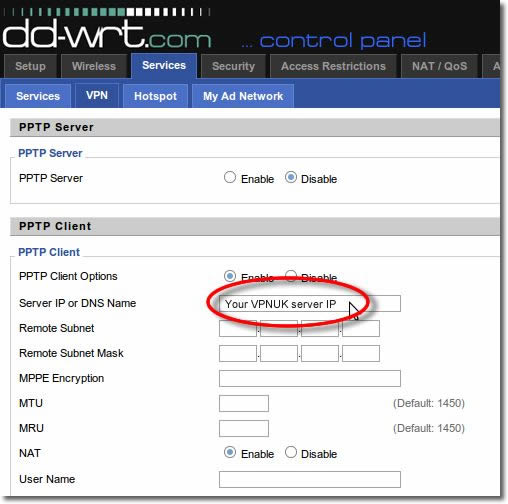
5. IP Address
Enter the IP address of your VPNUK server in ‘Server IP or DNS Name’. You can find the server information in your ‘Welcome to VPNUK’ email or in the ‘Client CP‘ on the VPNUK website.
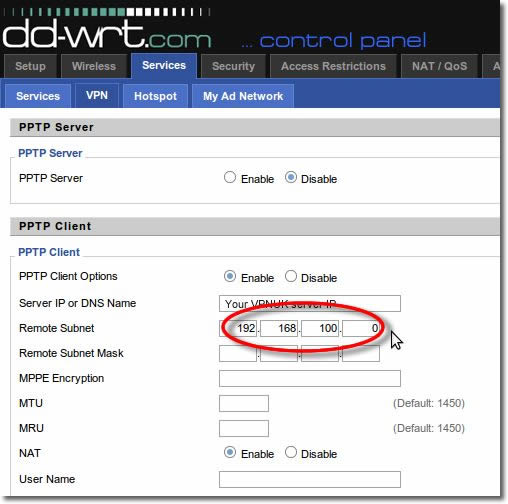
6. Remote Subne
Enter 192.168.100.0 into the ‘Remote Subnet’ fields. If that doesn’t connect once setup is complete please try 10.0.0.0
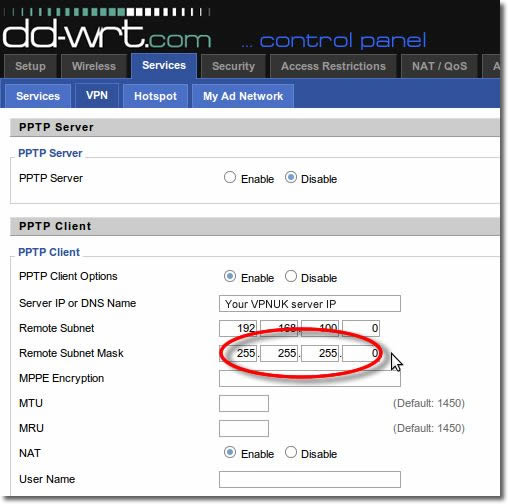
7. Remote Subnet Mask
Enter 255.255.255.0 into the ‘Remote Subnet Mask’ fileds.
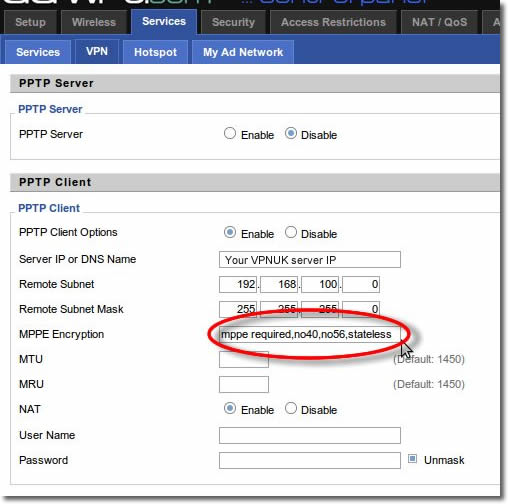
8. MPPE Settings
Enter ‘mppe required,no40,no56,stateless’ into the ‘MPPE Encryption’ field.
9. MTU Settings
Enter ‘1450’ into both the ‘MTU’ and ‘MRU’ fields
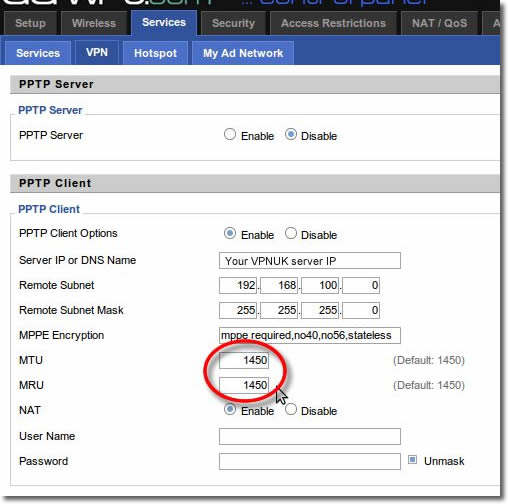
10. NAT Settings
Set NAT to ‘Enable’.

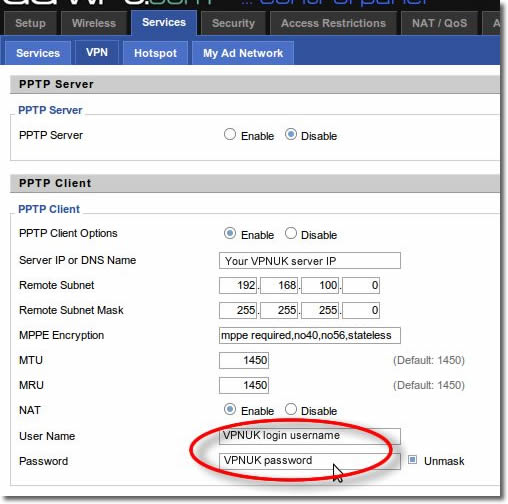
11. Login Details
Enter your username and password in the username and password fields.
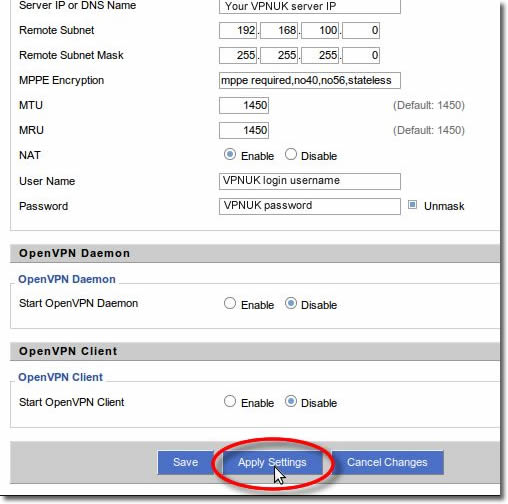
12. Apply Settings
Scroll to the bottom of the page and click on ‘Apply’.
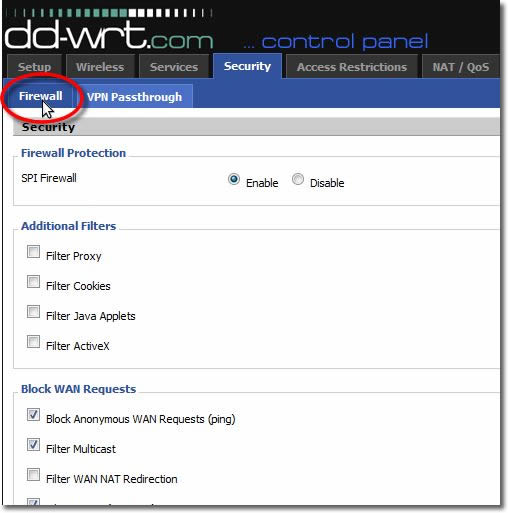
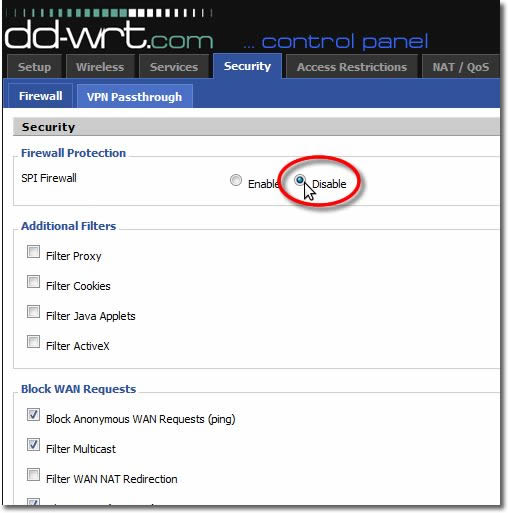
13. SPI Firewall
We now need to disable the SPI firewall on the device. For this, click on ‘Security’.

14. Firewall
Click on the ‘Firewall’ button.
15. Disable Firewall
Select the ‘Disable’ checkbox.
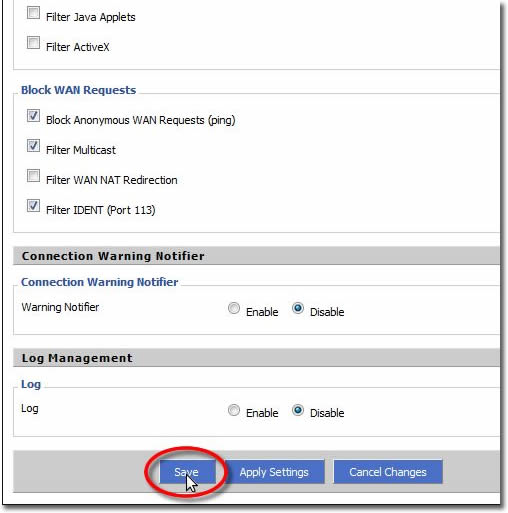
16. Save Firewall Settings
Scroll to the bottom of the page and
click on ‘Save’.
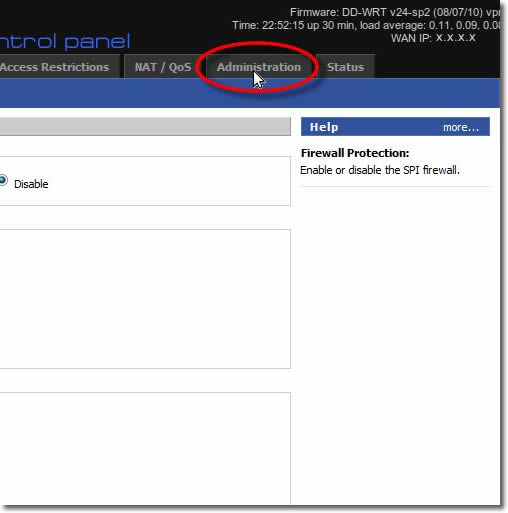
17. VPN Routing
Now we have to create a simple script that re-routes your internet connection through your VPN. For this, click on ‘Administration’.
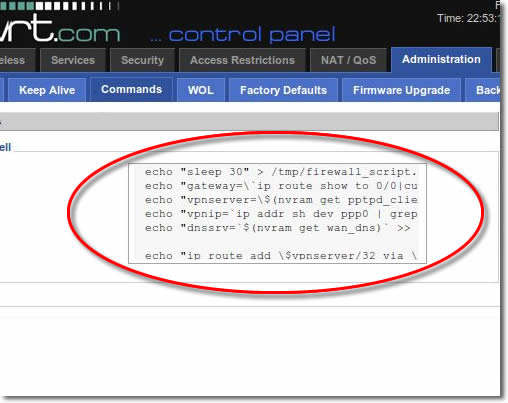
18. Commands
Click onto the ‘Commands’ button.
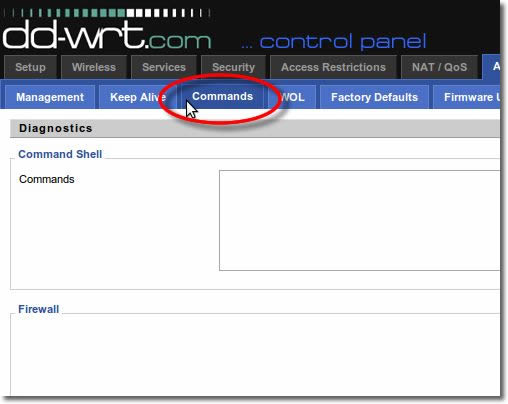
19. Paste the Commands
Paste the startup commands into the ‘Firewall’ Box. You can download a plain text file containing the commands here: https://vpnuk.info/dd-wrt-commands.txt
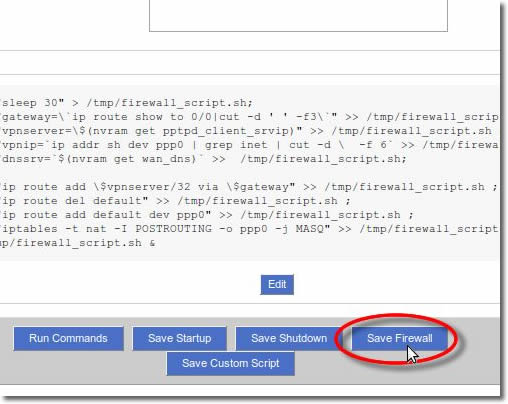
20. Save settings
Click onto the ‘Save Firewall’ button.
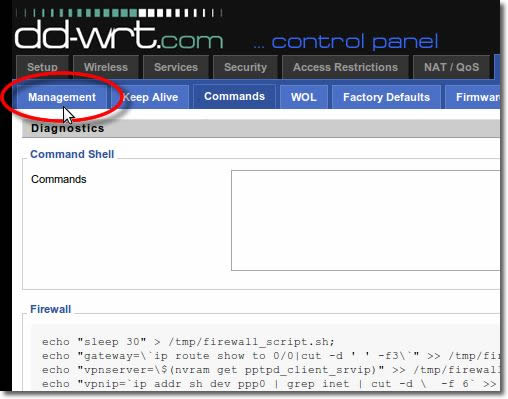
21. Finalise Installation
Now you have to restart the router. For this, click on ‘Management’ from the ‘Administration’ sub menu.
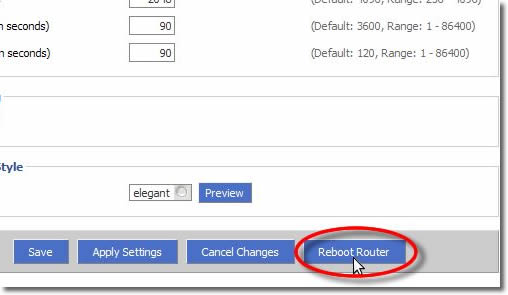
22. Reboot Your Router
Scroll down to the very end of the page and select ‘Reboot Router’.
Troubleshooting DD-WRT Issues
There are many reasons why a DD-WRT connection may fail to connect correctly. The most common issues are down to little errors like the incorrect VPNUK login username, password and server details, even having the incorrect time and date can impact on the connections.
Here is a checklist of common causes and fixes.
1. Try setting ‘Use DNSMasq for DNCP’, ‘Use DNSMasq for DNS’ and ‘DHCP-Authoritative’ to enabled as well as disabled.
2. Ensure the IP of the DD-WRT router is not conflicting with your main router. If your main router is currently 192.168.1.1 DD-WRT has to be in the same subnet, an example of ithis is: 192.168.1.51
3. Ensure the DD-WRT is connected to any other router from its WAN port.
4. You could also try setting the DD-WRT router to a ‘Static’ connection from the ‘Basic Setup’ page.
5. Go to your LAN settings and manually change your IP Address, Subnet Mask and Gateway so its pointing to the DD-WRT router.
You may also need to change the DNS servers, if you do not want to use your ISPs DNS you can use Google DNS 8.8.8.8 and 8.8.4.4
6. If you have setup a PPTP connection try adding: mppe required,no40,no56,stateless into the ‘Additional PPTP Settings’ text area.
7. If you have setup a PPTP connection please ensure the PPTP passthrough is enabled from Security -> VPN Passthrough.
8. Try disabling the firewalls on your routers or modems, these can quite often cause connection issues. Once its determined that a firewall is not causing the problem it can always be re-enabled.
9. MTU settings can quite often cause problems, you could try lowering the MTU settings by adding this command on a new line (below verb 3) on your OpenVPN configuration file: tun-mtu 1100
10. Its very important that your router has the correct time and date.
OpenVPN Log Instructions
If you are running an OpenVPN Connection you can create a Log which may enable you to see the problem, or you can open a support ticket and send us the details.
1. Add the following after ‘verb 3’ in your OpenVPN Config startup script:
log /tmp/openvpn.log
2. Reboot you router, wait for about 5 minutes and then run the following command (Run Command) from the command text area in administration (same place as the OpenVPN config file):
ln -s /tmp/openvpn.log /tmp/www/openvpnlog.html
3. Go to the DD-WRT index page and add: /user/openvpnlog.html to it so it looks something like: http://192.168.x.x/user/openvpnlog.html
## If any problems persist please open a support ticket and we will be able to assist you with our troubleshooting questionaire.