Setting up IKEv2 access on Android devices.
Screencast Tutorial
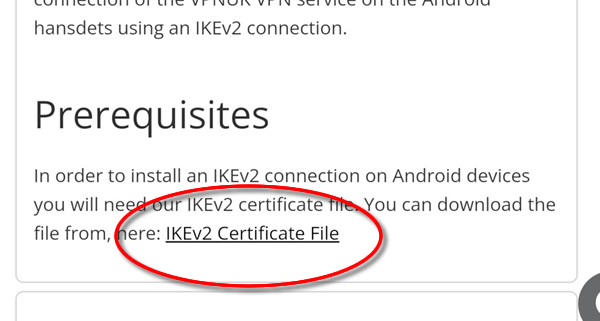
Prerequisites
This guide may vary slightly depending on your device and Android version. In order to install an IKEv2 connection on Android devices you will need our IKEv2 certificate file. You can download the file from here: IKEv2 Certificate File
1. Download Certificate File
Download the IKEv2 certificate file to your Android device from here: IKEv2 Certificate File
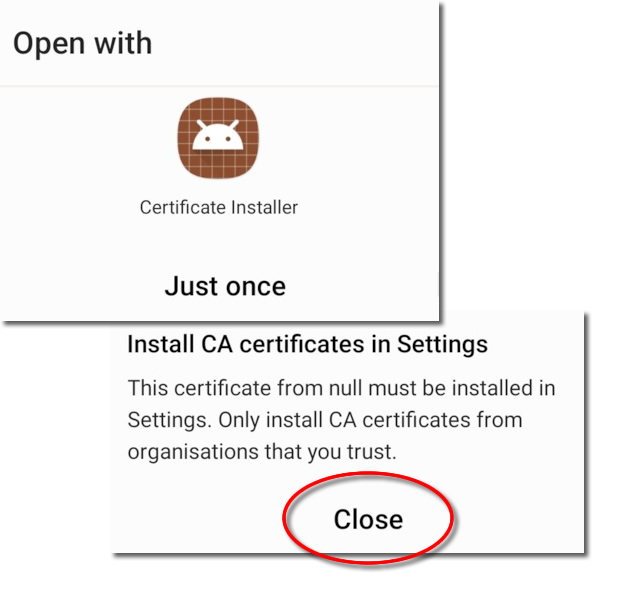
2. Install Certificate
You may be able to install the certificate from the certificate installer (Depending on your Android version). If you manage to install the certificate please skip to part 12.
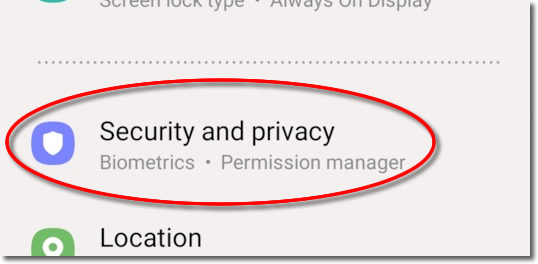
3. Go to ‘Settings’.
Go to Settings or click onto the ‘Settings’ cog.

4. Security and Privacy.
Go down to ‘Security and Privacy’.
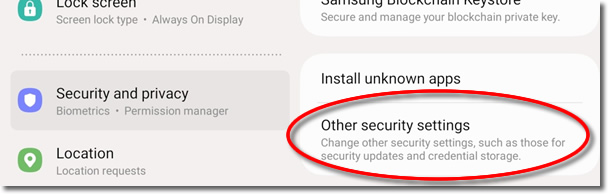
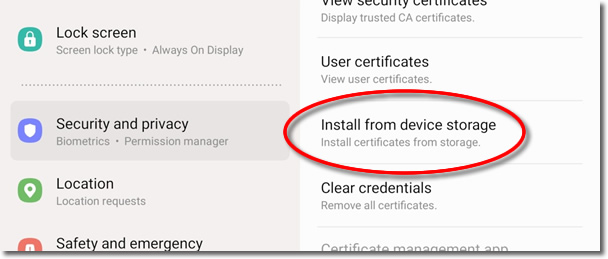
5. Other Security Settings
Click onto ‘Other security settings’.
6. Install Certificate
Click ono ‘Install from Device Storage’.
7. CA certificate
Select ‘CA certificate’.

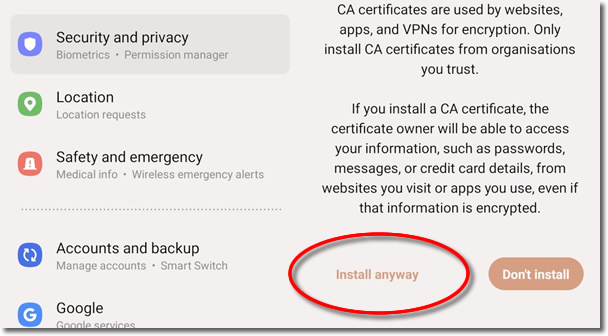
8. Install Anyway
Click onto ‘Install Anyway’.
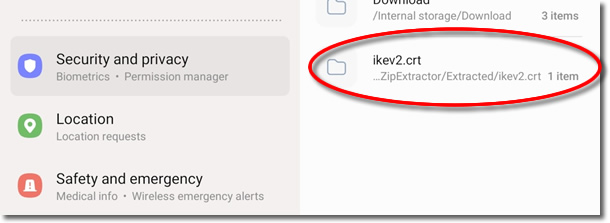
9. Certificate
Select the ‘ikev2.crt’ file that you downloaded earlier.
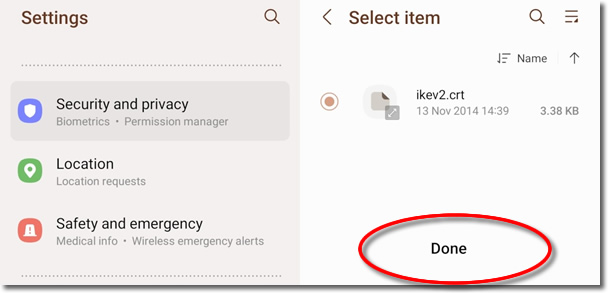
10. Done
Highlight the ikev2.crt certificate file and click onto ‘Done’.
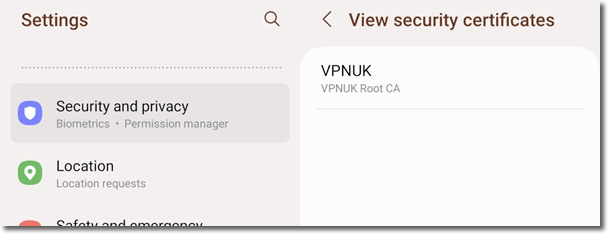
11. View Certificate
You can check the certificate file has installed by going to ‘User Certificates’. You should see the VPNUK Root CA.
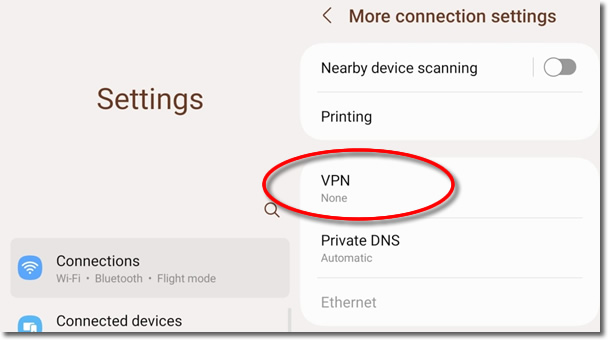
12. Connections
From the Settings menu, go to Internet Connections > More Connection Settings > VPN.
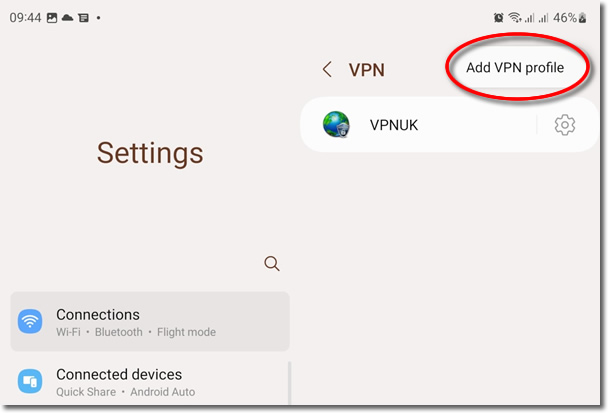
13. Add VPN Profile
Click onto ‘Add VPN Profile’.
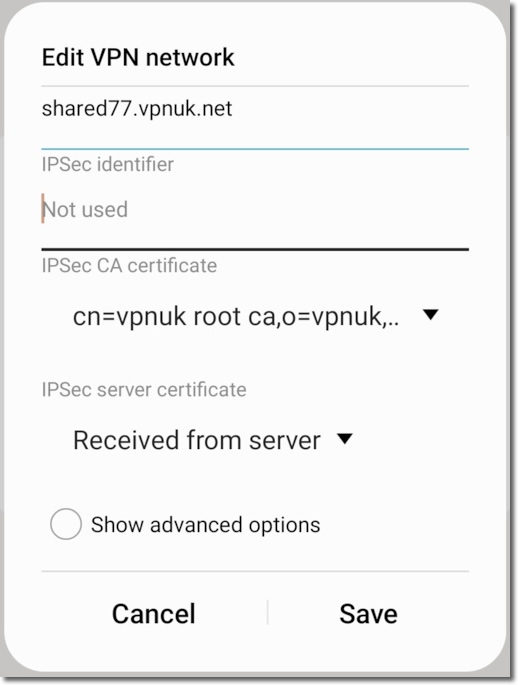
14. Connection Settings
Enter a name for the VPN Connection and then choose ‘IKEv2/IPSec MSCHAPv2’ from the ‘Type’ dropdown.
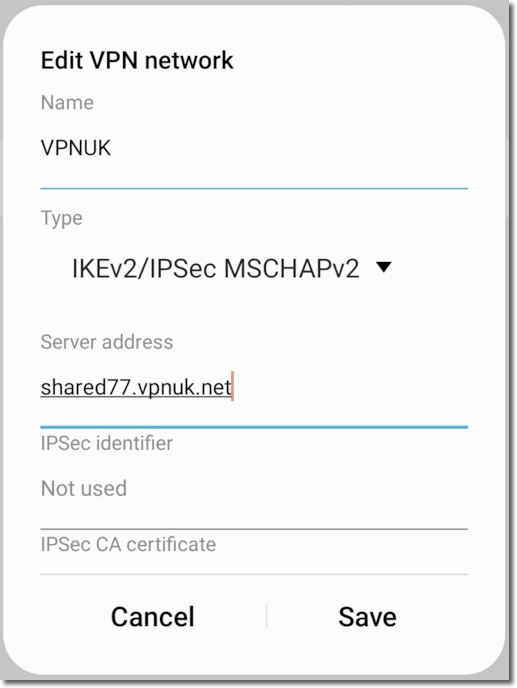
15. View Certificate
Enter your server details and then click onto Server Certificate and choose ‘VPNUK Root CA’ from the User Certifcate store.
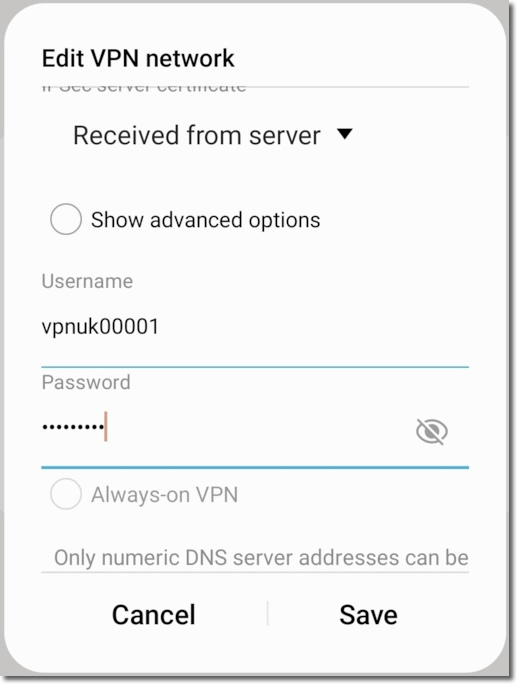
11. Credentials
Enter your Login Username and Password, then click ‘Save’.
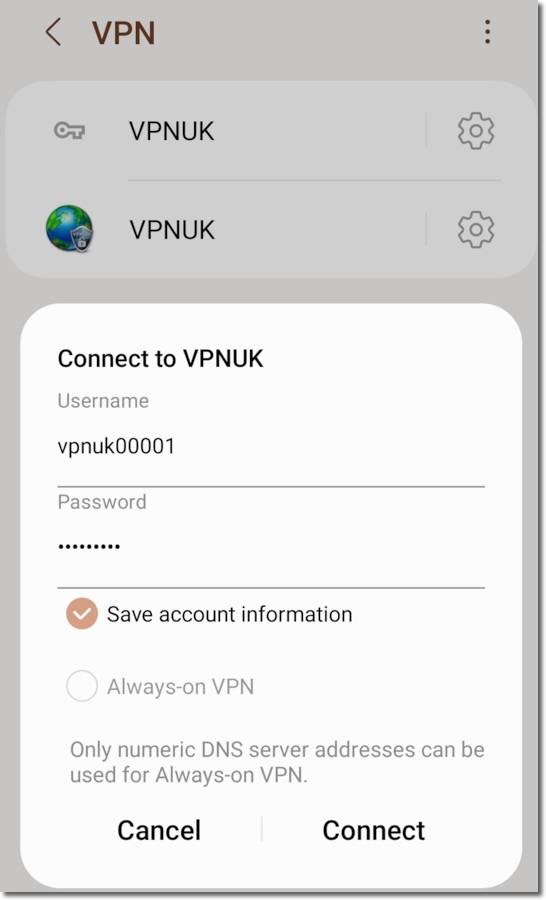
11. Connect
Click onto the connection and then click onto ‘Connect’.
Troubleshooting Guide
ISP DNS Hijack / DNS Leak Protection
Some ISPs will attempt to hijack your DNS settings which hinders the VPN connection from functioning correctly. If you find that your VPNUK connection does not route your traffic correctly you can try changing your Public DNS server to the VPNUK DNS server or to an alternative like Google DNS.
1. Go to Settings.
2. Go to ‘Wireless and Network’ settings.
3. Go to ‘Wi-Fi’.
4. Click your connection from the list of available networks for a few seconds and select ‘Modify network’ when the option appears.
5. Select the option to ‘Show advanced options’ and ensure the IP Settings dropdown is set to ‘Static’.
6. Change ‘DNS 1’ to the VPNUK Public DNS server: 109.169.6.2 or the Google Public DNS IP address: 8.8.8.8.
7. Thats it!