Setting up OpenVPN on ASUS (Merlin Firmware) routers.
We have made the configuration of OpenVPN on Asus routers flashed with Merlin Firmware as easy as possible for you by creating a pre-configured config file for OpenVPN Connect connections which can be downloaded or emailed to you by our system.
IMPORTANT: Setting up OpenVPN on Asus Routers requires the router to be flashed with Merlin Firmware.
Configure your VPNUK connection: Click Here to configure your connection.
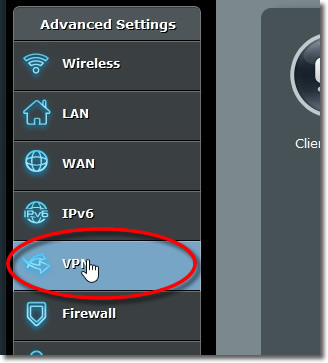
1. Go to VPN
Login to your ASUS router adminstration and from the ‘Advanced Settings’ panel go to ‘VPN’.
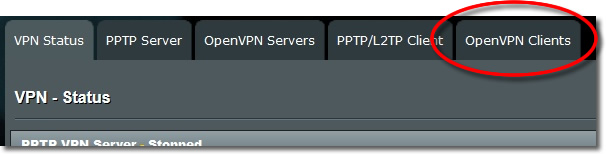
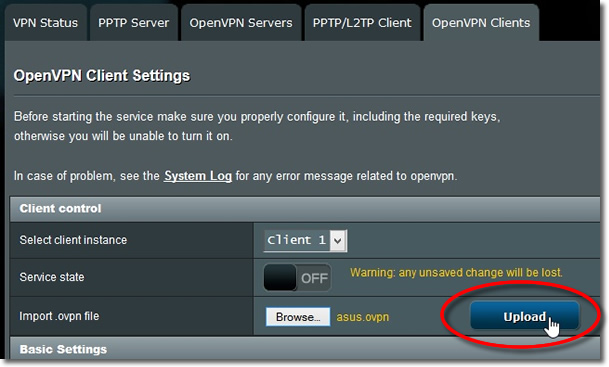
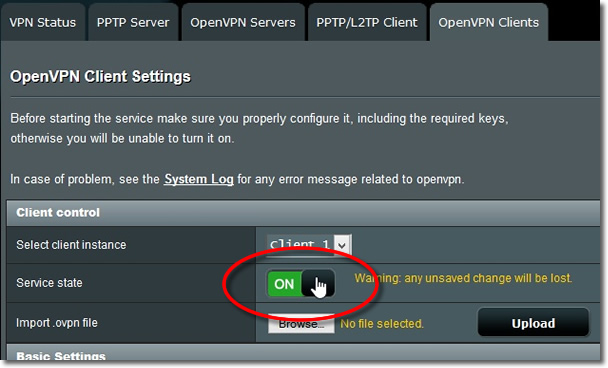
2. OpenVPN Clients
Click onto the ‘OpenVPN Clients’ tab.
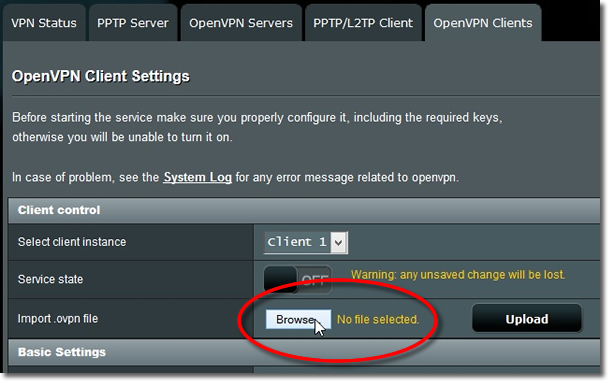
3. Import .ovpn file
Click onto the ‘Browse’ button.
4. Select .ovpn file
Locate the Configuration File that you downloaded earlier, or Click Here to download the file again.
5. Upload
Click onto the ‘Upload’ button.
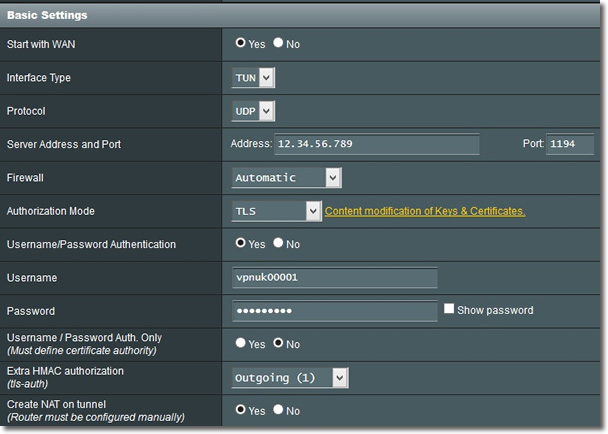
6. Basic Settings
1. Start with WAN: Yes.
2. Interface Type: TUN.
3. Protocol, Server and Address Port: Dependant on configuration file
settings.
4. Firewall: Automatic.
5. Authorisation Mode: TLS.
6. Username / Password Authentication: Yes.
7. Username and Password: Enter your VPNUK login Username and Password.
8. Username/Password Auth. Only: No.
9. Extra HMAC authorisation: Outgoing (1).
10. Create NAT on tunnel: Yes.
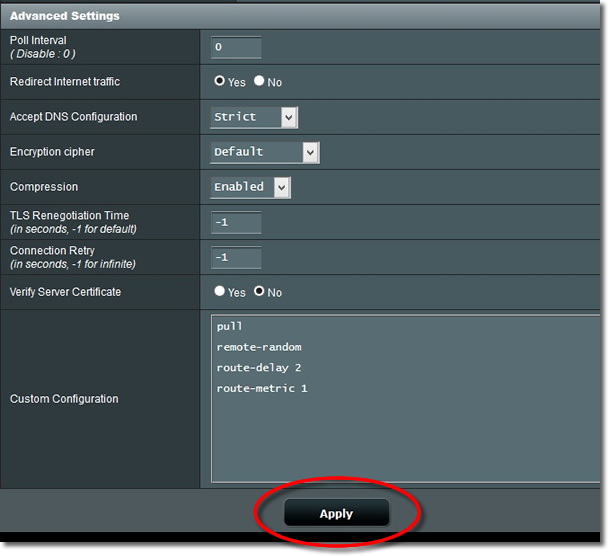
7. Advanced Settings
1. Poll Interval: 0.
2. Redirect Internet traffic: Yes.
3. Accept DNS Configuration: Strict.
4. Encryption cipher: Default.
5. Compression: Enabled.
6. TLS Renegotiation Time: -1.
7. Connection Retry: -1.
8. Verify Server Certificate: No.
9. Click onto the ‘Apply’ button.
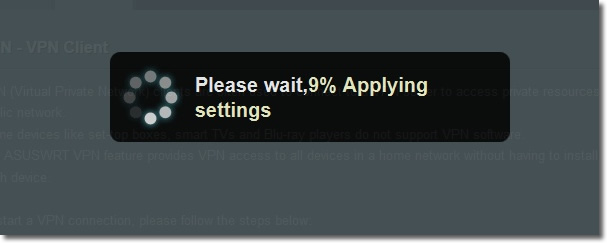
8. Applying Settings
Wait whilst the setting sare applied.
9. Service State
Toggle the connection to the ‘ON’ position to turn on the VPN.
10. Applying Settings
Wait whilst the settings are applied.
Note: The router can sometimes take a few minutes before it begins routing through the VPN.