Setting up an IKEv2 connection on Apple Mac OSX El Capitan
IMPORTANT NOTE:
IKEv2 connections are only currently compatible on Apple El Capitan OS X. If you are running an older OS X this IKEv2 connection is not compatible with your machine and should not be installed. Please use an L2TP or PPTP connection on older OS X.
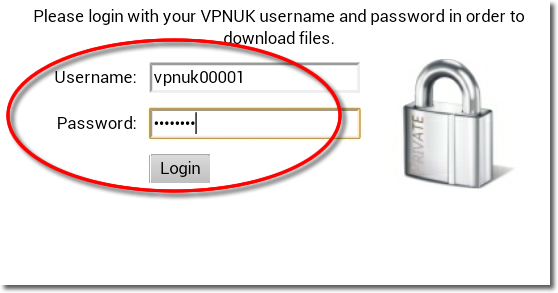
1. Start Configuration
Click Here to login and configure the IKEv2 connection. Our system will automatically email your Config file to you or you also have the option to download it manually.
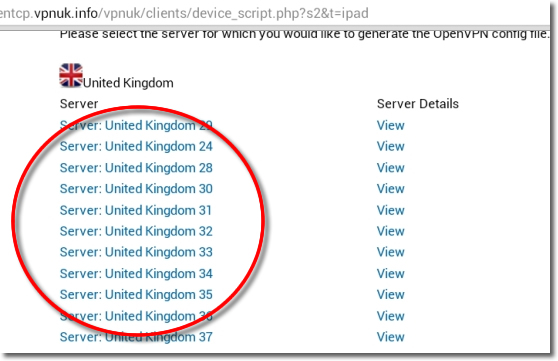
2. Choose a Server
If your account is on the Shared IP platform, you are welcome to choose any or as many servers as you like. If you have a Dedicated IP account your server details will be automatically selected for you.
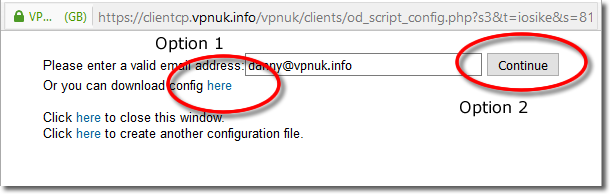
3. Get the files
You now have two options.
1. Click onto the ‘Download config here’ link in order to download the configuration file directly to your apple device.
2. Confirm your email address then click onto the Continue button, this will instruct our server to email your config file to you. The email will arrive after a couple of minutes.
NOTE: If you have any problems receiving or opening your configuration file please contact us. Some browsers and email clients do not know how to handle the config file. Its always recommended to use Safari and download the file directly to your device.
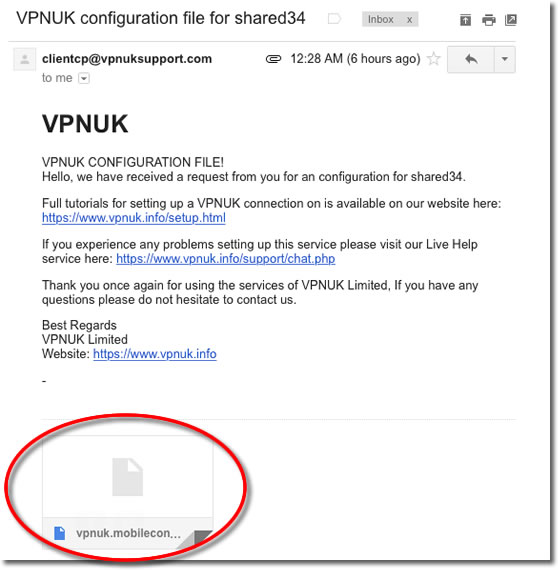
4. Open Email Client
If you chose to have the configuration file emailed to you, our system will automatically send the file to you. Double click onto the configuration file to intiate the installation.
5. Download Configuration File
Depending on your email client, you may receive a prompt to download the configuration file.

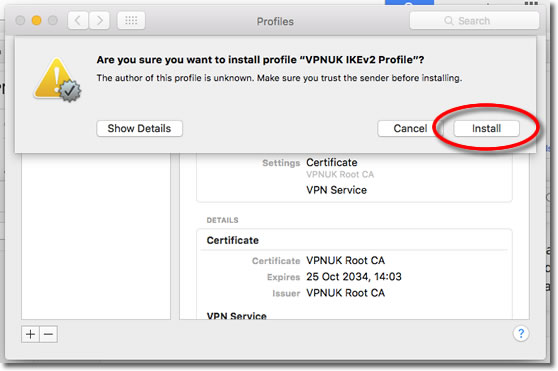
6. Certificate Profile Installer
A certificate profile installer will now open, click onto ‘Install’.
7. Certificate Profile Installer
Click onto ‘Continue’.

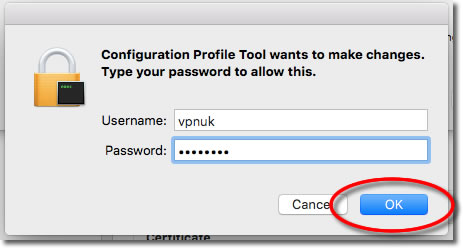
8. Configuration Confirmation
Confirm the installation by entering your Mac OSX username and password, then click onto the ‘OK’ button.
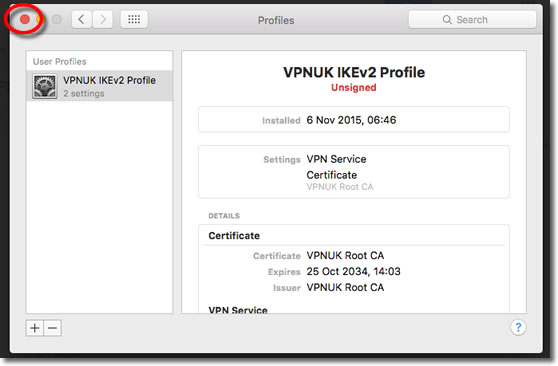
9. Configuration File Installed
Your initial IKEv2 configuration has now been installed, you can close profile window.
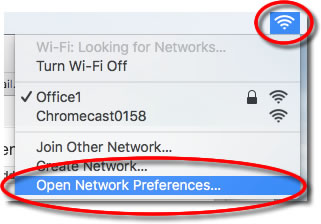
10. Final Configuration
Go to your menu bar and click your networking icon, then select ‘Open Network Preferences’.
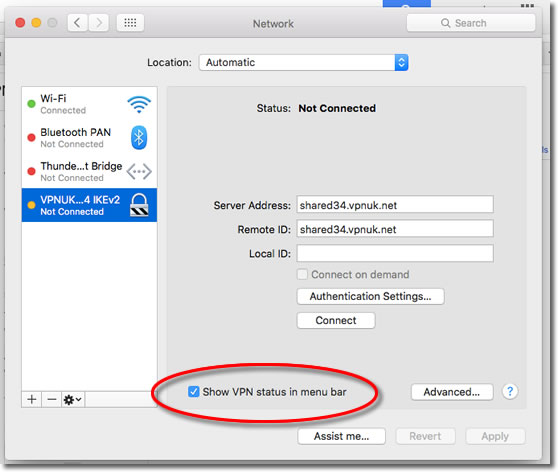
11. VPN Status
Select the checkbox to ‘Show VPN status in the menu bar’.
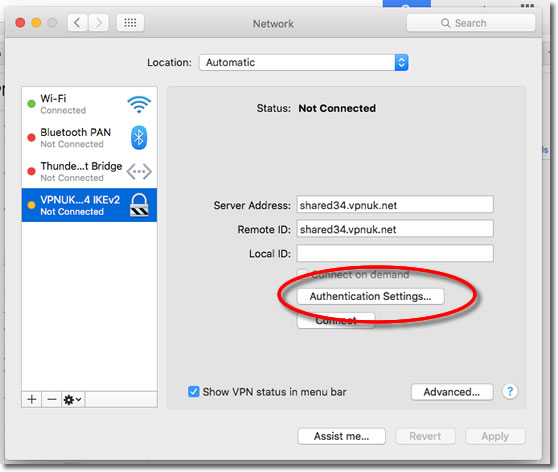
12. Authentication Settings
Click onto the ‘Authentication Settings’ button.
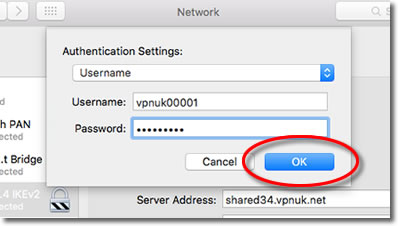
13. VPNUK Password
Enter your VPNUK login password and then click onto the ‘OK’ button.
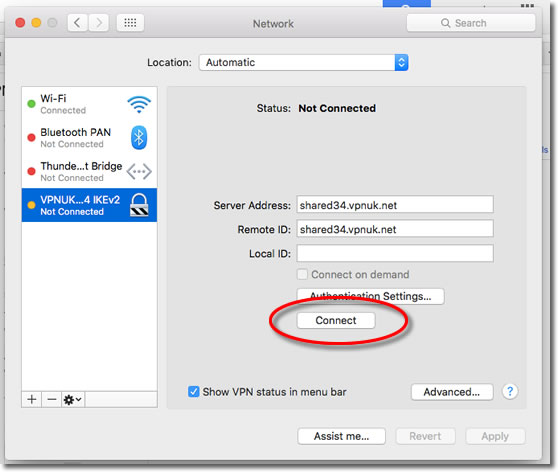
14. Connect to VPNUK
Your IKEv2 connection is now configured, click onto the ‘Connect’ button to connect to the VPNUK service.
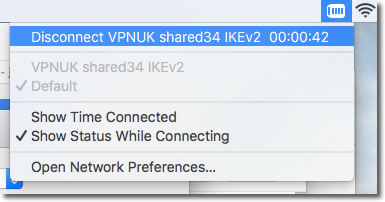
15. Connection overview
You can now view the connection status and also Connect/Disconnect from the VPNUK service in future from the VPN Status icon in the menu bar.
Troubleshooting Guide
This tutorial will guide you through the procedure involved in disabling IPv6 on Mac OS X.Prerequisites: Please ensure your VPNUK account is setup before proceeding.
Go to Terminal: Finder > Applications > Utilities > Termnial.
To display the full list of available hardware enter the following command: sudo networksetup -listallhardwareports
You now need to disable IPv6 on your network connections and VPNUK account.
The command for disabling IPv6 on your Wi-Fi connection is usually: sudo networksetup -setv6off Wi-Fi
The command for disabling IPv6 on your Ethernet connection is usually: sudo networksetup -setv6off Ethernet
The command for disabling IPv6 on your VPNUK connection is usually: sudo networksetup -setv6off VPNUK
Run all of the necessary commands and then go to your networking overview: Launchpad > Network
Select your Ethernet connection and click onto the Advanced button.
Go to the TCP/IP tab and ensure IPv6 is set to: Off.
Repeat the procedure for your other connections (Wi-Fi and VPNUK).
ISP DNS Hijack / DNS Leak Protection
Some ISPs will attempt to hijack your DNS settings which hinders the VPN connection from functioning correctly. If you find that your VPNUK connection does not route your traffic correctly you can try changing your Public DNS server to the VPNUK DNS server or to an alternative like Google DNS.
1. Right click onto your network connection icon in the menu bar and select Open Network Preferences.
2. Click onto your active internet connection from the left hand menu and then click ‘Advanced’.
3. Go to the DNS tab.
4. Enter a DNS IP into the DNS server box. Google DNS is 8.8.8.8. VPNUK Public DNS is:
109.169.6.2
5. Click ‘OK’ and ‘Apply’ the change.
Send all traffic over the VPN
Mac OS X requires that you instruct it to Send traffic over the VPN connection. Follow this tutorial if you do not appear to be on the VPN when connected.
1. Right click onto your network connection icon in the menu bar and select Open Network Preferences.
2. Click onto your VPNUK connection from the left hand menu and then click ‘Advanced’.
3. Select the option to ‘Send All Traffic Over The VPN’.
4. Click ‘OK’ and ‘Apply’ the change.