Mac OSX Viscosity / OpenVPN Setup
Viscosity provides a complete OpenVPN solution for Mac OSX 10.5 and higher, it does not require any additional software. Viscosity has an import option which makes setting up the VPN connection on your Mac very easy. If you would like to try Viscosity it is free for the first 30 days. If you would like to keep it after that time it costs just $9.00 to purchase a license from its development team Spark Labs. If you would like to find out more about Viscosity you can do so at the Spark Labs website here.
Click here to download Viscosity, you can evaluate the software for free for 30 days.
Click here to purchase a license for Viscosity.
Download the VPNUK config files
Our system will automatically email your Config files to you so that you can save them to your system and add them into Viscosity. You can also choose to download the file(s). OpenVPN Configuration Files . You can configure as many different servers as you like.
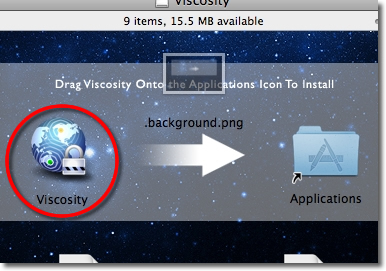
2. Begin the installation process
In order to begin the installation you need to drag the Viscosity icon onto the ‘Applications’ icon.
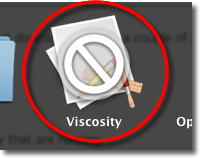
3. Open Viscosity
Go to ‘Applications’ and double click the ‘Viscosity’ icon to begin the installation.
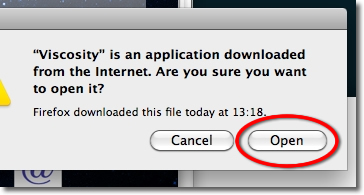
4. Confirm
Click onto the ‘Open’ button if you are prompted for confirmation.
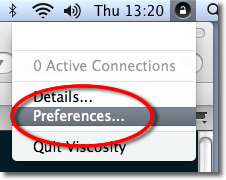
5. Viscosity Icon
Click onto the Viscosity icon from the taskbar and choose ‘Preferences’.
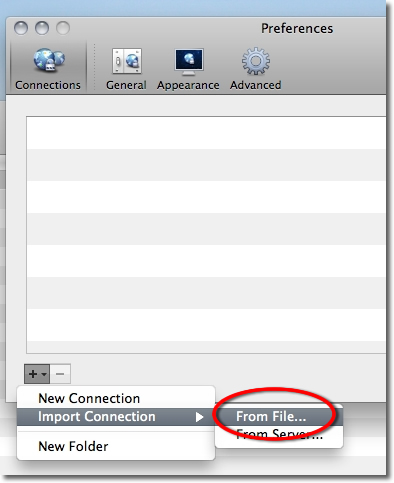
6. Import Connection Settings
Click onto the ‘+’ icon and select ‘Import Connection -> From File’ in order to import the VPNUK openvpn settings.
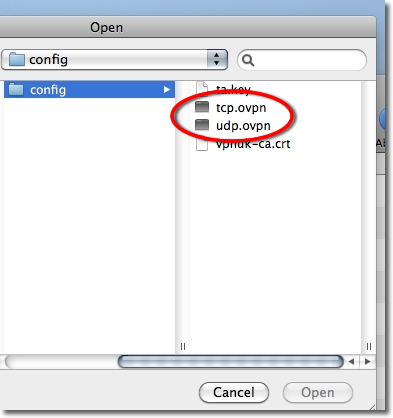
7. Locate Config Files
Navigate to the ‘Config’ file you downloaded earlier in Part 1 and select the .ovpn config file.
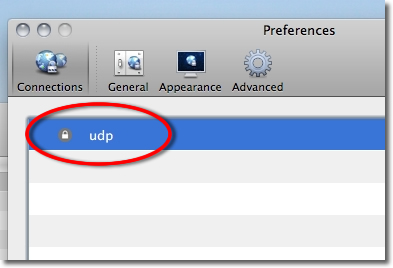
8. Finalise Configuration
Double click onto the connection.
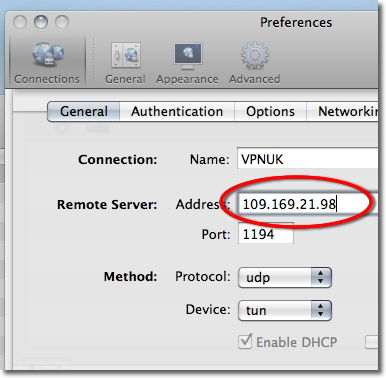
9. Account Settings (Optional)
From the ‘General’ tab you can edit the IP of the server you are connecting to into the ‘Remote Server – Address’ field. You can find the server information in your ‘Welcome to VPNUK’ email or in the members area on the VPNUK website.
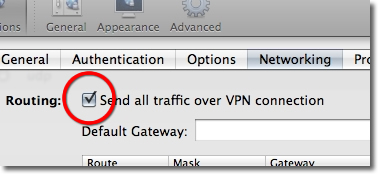
10. Networking
Click onto the ‘Networking’ tab and place a check in the routing option to ‘Send all traffic over the VPN connection’.
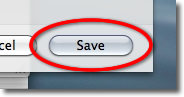
11. Save Settings
Click onto the ‘Save’ button to save the settings.
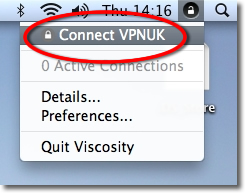
12. Thats It!!
You have now successfully setup the VPNUK connection on Viscosity. Click onto the Viscosity icon in the taskbar and select ‘Connect’.
13. Login Details
The first time you connect to VPNUK through Viscosity you will be asked to enter your login ‘Username’ and ‘Password’. You can save these details in the keychain and not receive this prompt in the future.

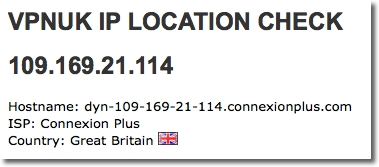
14. Thats It!!
You will have now successfully logged into your VPNUK account using Viscosity. You can check this here or by going to any IP location website.
Troubleshooting Guide
Go to Terminal: Finder > Applications > Utilities > Termnial.
To display the full list of available hardware enter the following command: sudo networksetup -listallhardwareports
You now need to disable IPv6 on your network connections and VPNUK account.
The command for disabling IPv6 on your Wi-Fi connection is usually: sudo networksetup -setv6off Wi-Fi
The command for disabling IPv6 on your Ethernet connection is usually: sudo networksetup -setv6off Ethernet
The command for disabling IPv6 on your VPNUK connection is usually: sudo networksetup -setv6off VPNUK
Run all of the necessary commands and then go to your networking overview: Launchpad > Network
Select your Ethernet connection and click onto the Advanced button.
Go to the TCP/IP tab and ensure IPv6 is set to: Off.
Repeat the procedure for your other connections (Wi-Fi and VPNUK).
ISP DNS Hijack / DNS Leak Protection
Some ISPs will attempt to hijack your DNS settings which hinders the VPN connection from functioning correctly. If you find that your VPNUK connection does not route your traffic correctly you can try changing your Public DNS server to the VPNUK DNS server or to an alternative like Google DNS.
1. Right click onto your network connection icon in the menu bar and select Open Network Preferences.
2. Click onto your active internet connection from the left hand menu and then click ‘Advanced’.
3. Go to the DNS tab.
4. Enter a DNS IP into the DNS server box. Google DNS is 8.8.8.8. VPNUK Public DNS is: 109.169.6.2
5. Click ‘OK’ and ‘Apply’ the change.