Setting up PPTP access under Windows Vista.
The following instructions go step–by–step through the creation process. These instructions work under all the client– side variations of Windows Vista, namely Home Basic, Home Premium, Business, and Ultimate.
1. Open the Control Panel
First, click on the Start button and click ‘Control Panel’. This opens up the ‘Control Panel Home.’

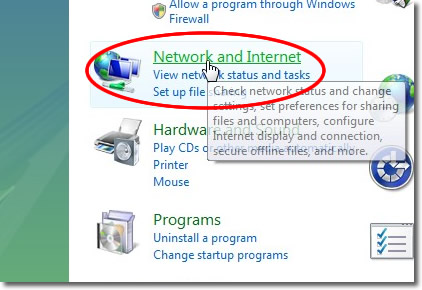
2. Go to the ‘Network and Internet’ panel
Next, click on the ‘Network and Internet’ control panel.
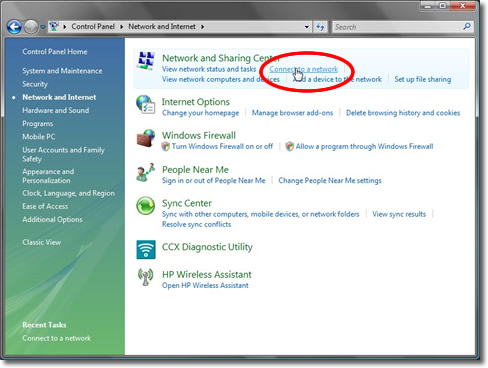
3. Connect To A Network
Next, click on ‘Connect to a network’.
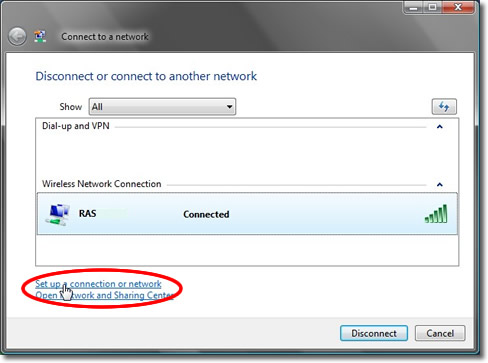
4. Set up the VPN connection
Click on ‘Set up a connection or Network’.
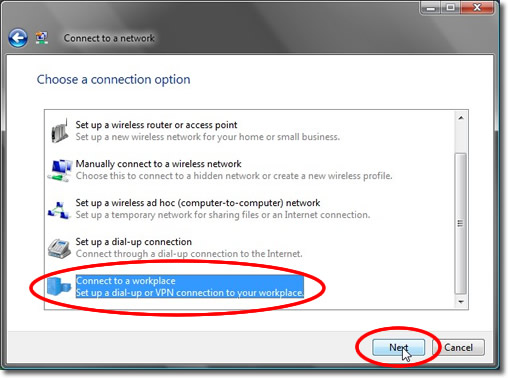
5. Choose the Connection Type
On the next screen, click on ‘Connect to a workplace’ then click ‘Next’.
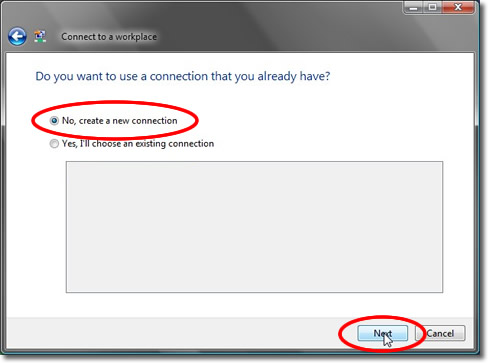
6. Using an Existing Connection (if it appears)
If you are asked if you would like to use an existing connection choose ‘No, create a new connection’ and click ‘Next’.
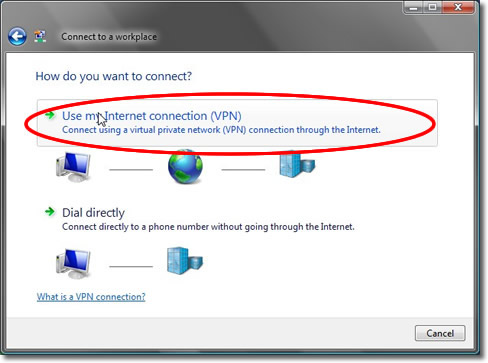
7. Select the Internet connection
Next click ‘Use my Internet connection (VPN)’.
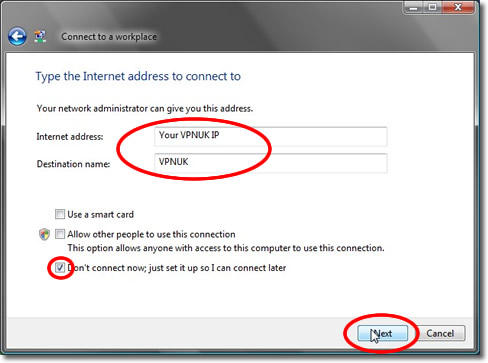
8. Enter the server information
Enter the server IP and destination name. Check the box titled ‘Don’t connect now; set it up so I can connect later’ and click ‘Next’. You can find the server information in your ‘Welcome to VPNUK’ email or in the ‘Client CP‘ on the VPNUK website.
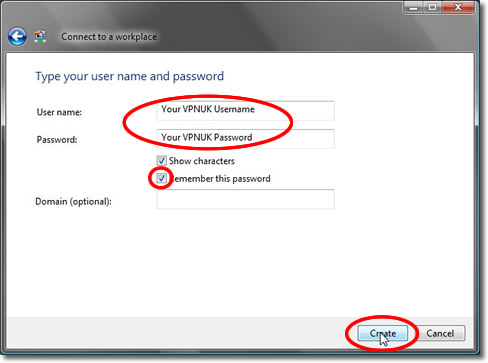
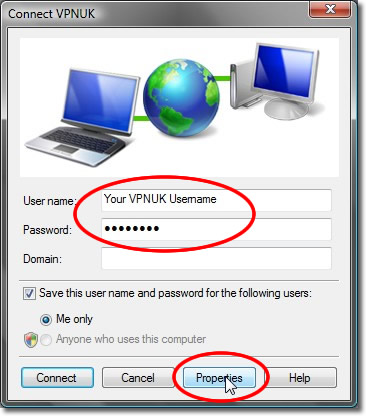
9. Enter your username and password
Enter your VPNUK username and password. Optionally, check the ‘Remember this password’ checkbox.
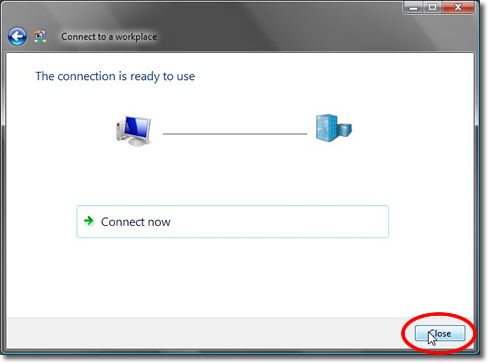
10. Connection Ready
Click the ‘Close’ button to return to the ‘Network and Internet’ screen.
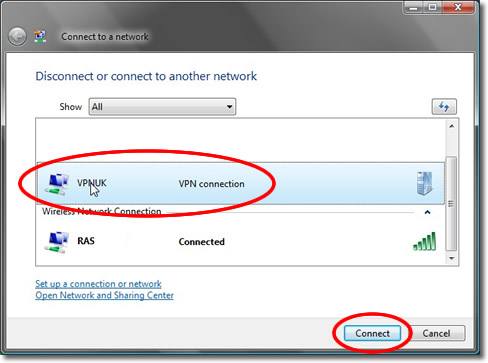
11. Go to the connection
Now click on ‘Connect to a network’ again.
11. Select the connection properties
In the ‘Connect to a network’ screen, you should see the connection that we have just set up. Right–click on the connection document and choose ‘Properties’ from the menu.
12. Select Options
In the property window, click the ‘Properties’ tab.
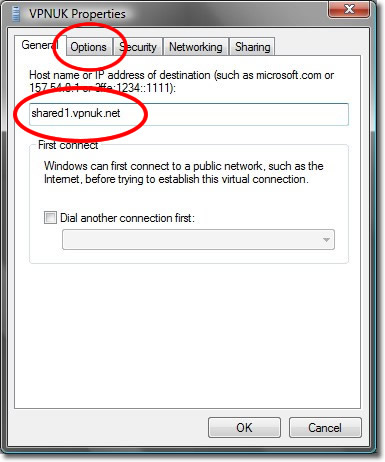
13. Go to the Options tab
Next, ensure your host name or IP match the server your account has been assigned to and click the ‘Options’ tab.
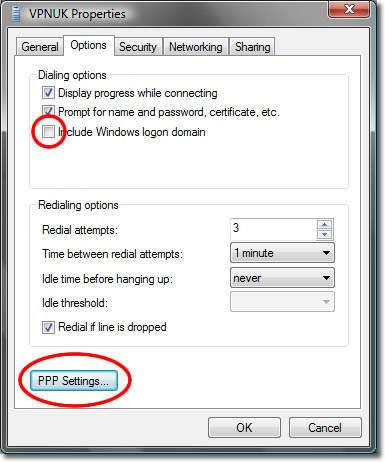
14. Options – Disable Windows Domain.
Remove the tick from the ‘Inlclude Windows logon domain’ dialing options and click onto PPP settings.
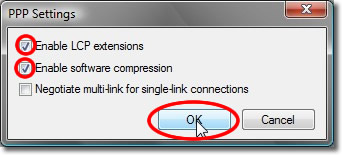
15. PPP Settings
Place a tick in the ‘Enable LCP extensions’ box and ‘Enable software compression’ box and then click ‘OK’.
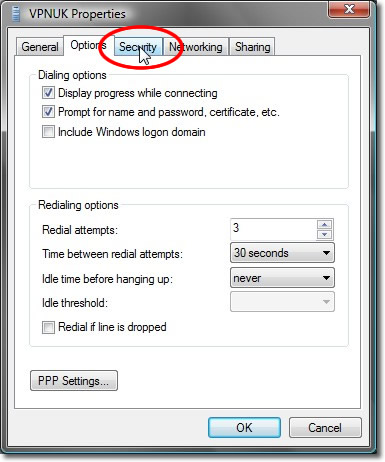
16. Go to Security
Click onto the ‘Security’ tab
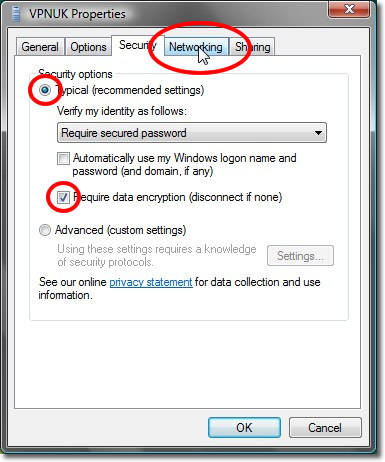
17. Security Settings
Place a check in the Typical (recommended settings), ensure the ‘Require data encryption’ checkbox is checked, then click onto ‘Networking’
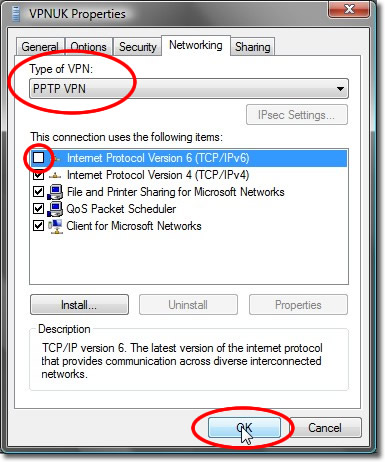
18. Setting up over PPTP
In ‘Networking’ tab click on the ‘Type of VPN’ dropdown menu and select ‘PPTP
VPN’, uncheck ‘Internet Protocol Version 6 (TCP/IPv6)’ and Click onto the ‘OK’ button.
19. Connecting to VPNUK Servers
To connect to whichever vpn you have set up, go to the Start button and click onto ‘Connect To’. Then click on the VPNUK connection.
Troubleshooting Guide
ISP DNS Hijack / DNS Leak Protection
Some ISPs will attempt to hijack your DNS settings which hinders the VPN connection from functioning correctly. If you find that your VPNUK connection does not route your traffic correctly you can try changing your Public DNS server to the VPNUK DNS server or to an alternative like Google DNS.
1. Right click onto your network connection icon in the sys tray and select ‘Open Network and Sharing Centre’.
2. Go to Change Adapter Settings’ from the left hand menu.
3. Right click onto your active Ethernet or Wireless Connection
and select ‘Properties’.
4. Double click onto ‘TCP/IPv4’ from the list of items.
5. Enter a DNS IP into the DNS server box. Google DNS is 8.8.8.8. VPNUK Public DNS is: 109.169.6.2