Setting up the VPNUK App v1.9 on iOS
The VPNUK App designed for Apple iOS devices provides a highly secure, multi configurable and widely compatible OpenVPN connection to the VPNUK network. Moreover, it offers an extremely simple interface for new and existing users of VPNUK. The VPNUK app has been designed and created to be very easy to use, we have ensured zero configuration is required from the user in order to connect to a VPNUK account. Once installed simply enter your login credentials, choose your server and then hit the connect button, it really is as simple as that. New users can select a free 7 day unlimited trial account on any of the VPNUK platforms.
![]()
1. Go to App Store
Go to App Store on your Apple device

2. Install VPNUK from App Store
Install VPNUK from the App Store. Once installed, click onto the ‘VPNUK’ icon to start the application. The VPNUK App v1.9 can be found at: https://apps.apple.com/us/app/vpnuk/id1485091594
![]()
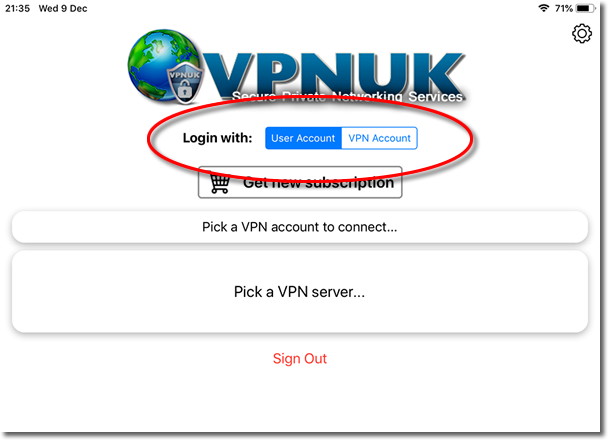
3. Select account type
The VPNUK App allows users to connect to their account from their User Account or their VPN Account. We’ll show you how to connect to your existing VPN Account first, without logging into your user account. If you would prefer to login using your User Account credentials please go to Part 7 of this setup guide. To continue setting up with a VPN Account connection, click onto ‘VPN Account’.
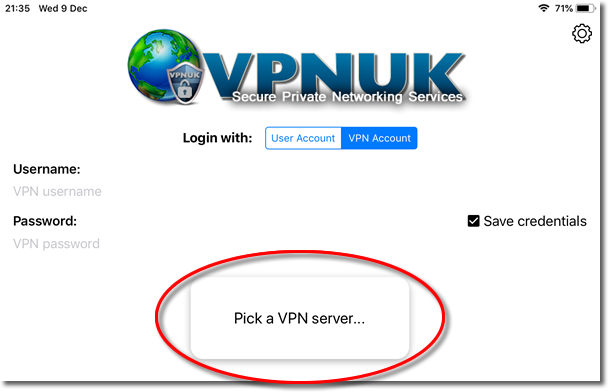
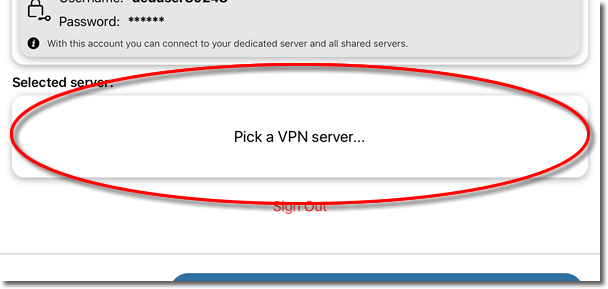
4. Login username and password.
Enter your VPN login ‘username’ and ‘password’ and then click onto ‘Pick a VPN Server..’.
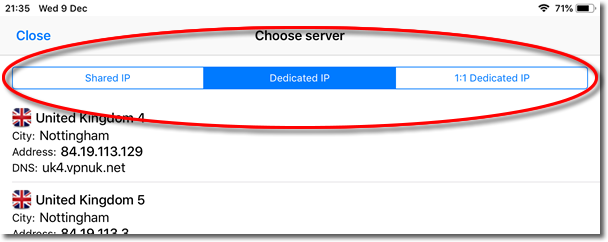
5. Select your server
Select the type of account you have or would like to connect to, then click onto your server. NOTE: If you have an account on a Dedicated or 1:1 Server please ensure you connect to the server that has been assigned to you. All users can connect connect to any of the Shared IP servers.
6. Connect.
You can now connect to your VPNUK Account.

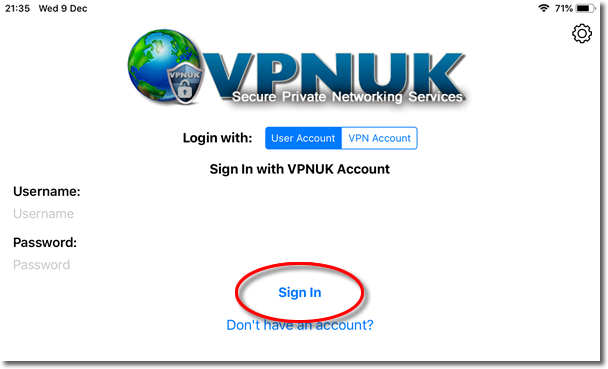
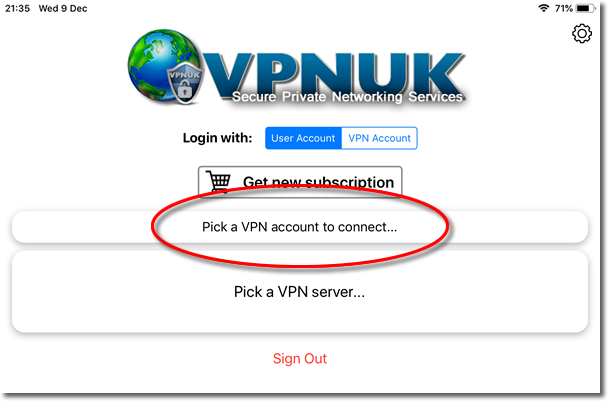
7. Connecting to VPNUK through your User Account
Enter your User credentials and then click ‘Sign In’.
8. Choose VPN Account
Click onto the ‘Pick a VPN Account to connect..’ button.
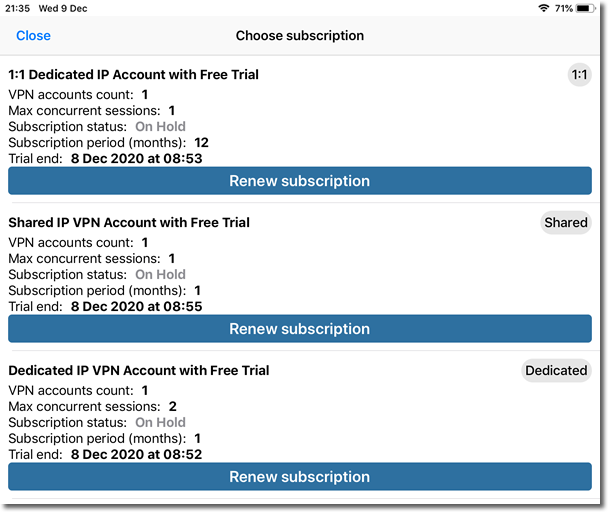
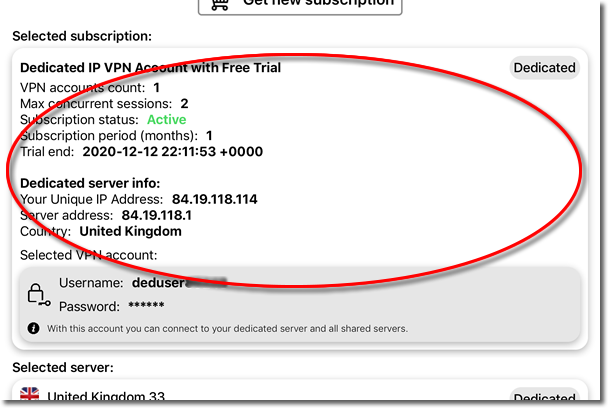
9. Select your subscription
You will now be presented with at least one subscription, click onto the VPN Account you would like to connect to.
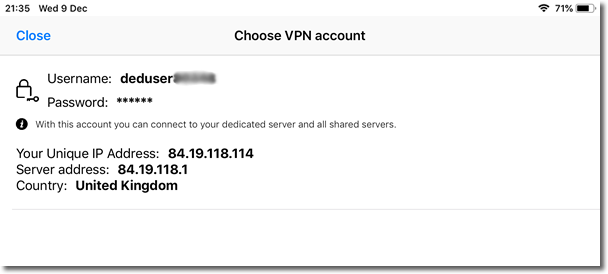
10. Select the account
You will now be presented with at least one account, click onto the account you would like to connect to.
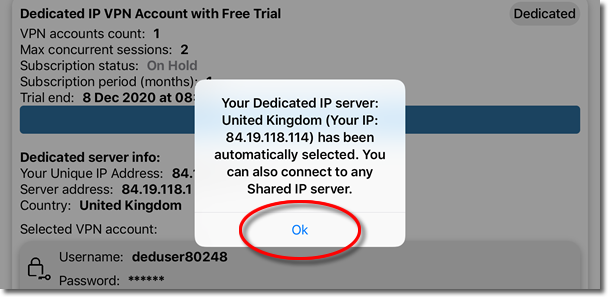
11. Server Confirmation (Dedicated IP Accounts Only)
If your account is located on a Dedicated IP server the system will automatically select your server for you. You can also connect to any of our Shared IP servers. Click onto ‘OK’.
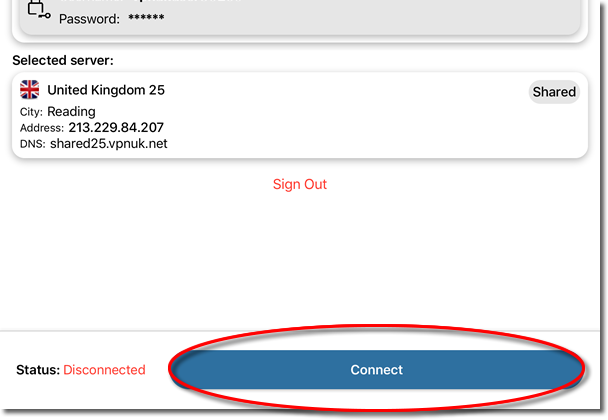
12. Selecting your Server
If your account is located on one of our Shared IP servers you can now click onto the ‘Pick a VPN Server..’ button and select any Shared IP server from the list of servers.
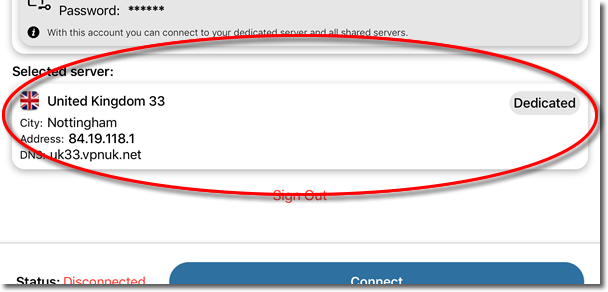
13. Switching Server
If you would like to switch server at any time you can do so by clicking onto the Selected Server.
14. Connect to the VPN
You can now Connect by clicking onto the ‘Connect’ button.
15. Switching Account
If you have multiple accounts and would like to switch to a different VPN Account click onto the ‘Selected Subscription’ and you can choose another of your accounts to connect to.
Optional Settings
1. Settings
Click onto the settings icon to view the optional settings.

2. Socket Type
You have the choice of TCP or UDP protocol when connecting to the VPNUK service.

3. Port
Each protocol has a choice of port which you can use.

4. Kill Switch
If your internet connection is lost or if it changes and your VPN is disconnected you can choose to automatically reconnect.