Setting up VPN access on a Windows 10 Mobile Device
Setting up vpn access on a Windows Mobile device is fairly straight forward. The following instructions will take you step by step in setting up your account. Windows Phone configured with Windows 10 moble is compatible with connections made through IKEv2 which involves downloading and installing a server certificate file for each server you would like to connect to.
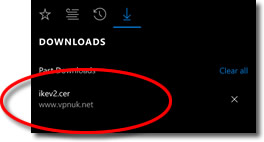
1. Download and Install the Certificate file
Download and install our certificate file, you will be asked if you would like to open or save the file, choose ‘Save’.
Click here to download our IKEv2 certificate as a .crt file.
Click here to download our IKEv2 certificate as a .cer file.

2. Open the Certificate
Tap onto the screen to open the certificate file..
3. Install the Certificate
Click onto the ‘Install’ button to install the certificate to the mobile device.

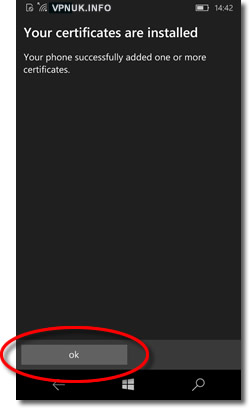
4. Installation Confirmation
Once the certificate has been installed click onto the ‘OK’ button.
5. Setting up the VPN connection
From the home screen go to the main menu and select ‘Settings’.
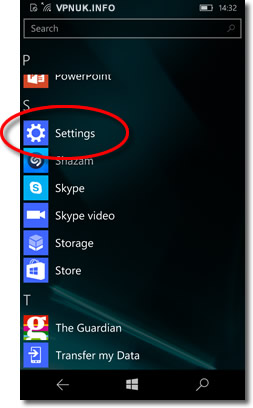
6. Settings Menu
Scroll down the settings list and select ‘Network & Wireless’.
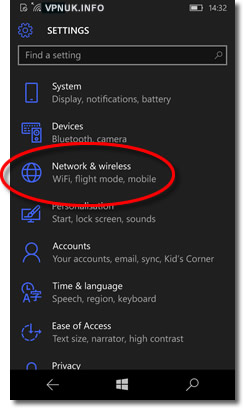
7. Network and Wireless Options
Goto the bottom of the list of option and seclect ‘VPN’.
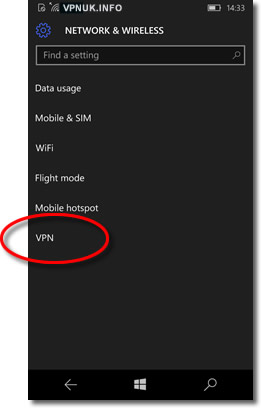
8. Add a VPN connection
Click onto the plus ‘+’ symbol to create a new VPN account.
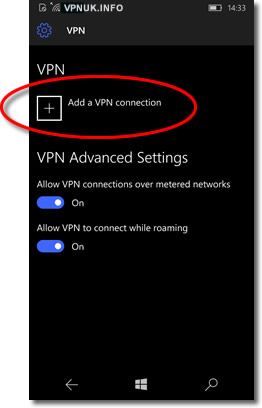
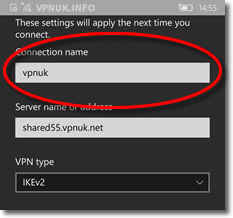
9. Connection name
Enter any name for the connection.
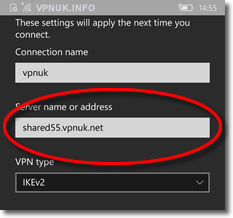
10. Server name
Enter any server name, clients on our SHared IP platform can connect to any of our Shared IP servers. Clients on the Dedicated IP platform should enter the server their unique IP address corresponds to. You can find server addresses in your ‘Welcome to VPNUK’ email or in the ‘Client CP‘ on the VPNUK website.
NOTE: Please only enter the server name, DO NOT enter the IP address of the server.
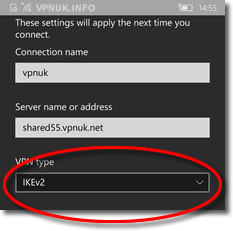
11. VPN type
Choose ‘IKEv2’ from the choice of VPN connection types.
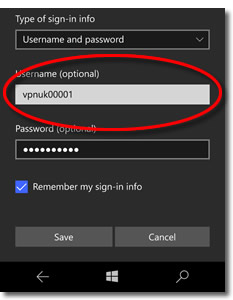
12. Type of sign-in info
Choose ‘Username and password’ as the Type of sign-in info.
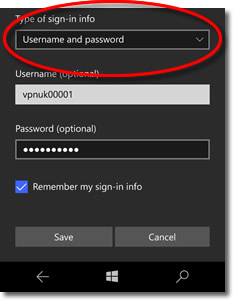
13. Login username
Enter the username that was sent to you in the ‘Welcome to VPNUK’ email.
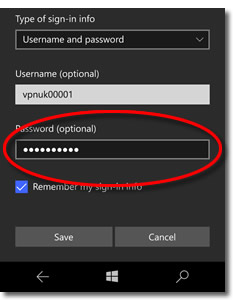
14. Login password
Enter the password that was sent to you in the ‘Welcome to VPNUK’ email.
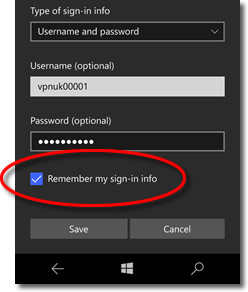
15. Remember info (Optional)
You can choose the phone to save the login username and password. This will save entering the details during future login procedures.
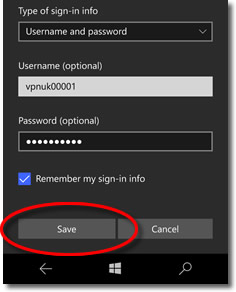
16. Save your connection details
You can now save the connection by clicking onto the ‘Save’ button.
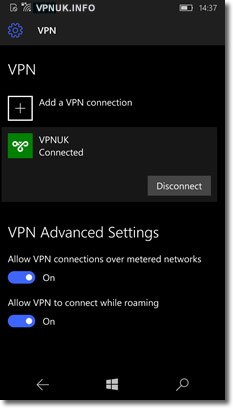
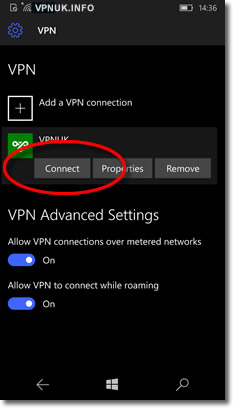
17. Connecting to the VPN
Click onto the profile name you would like to connect to and then click onto the ‘Connect’ button.
18. VPN Connected
Once connected the VPN profile will display a ‘Connected’ state.