Setting up L2TP/IPSec access under Windows 7.
The following instructions will guide you through a manual connection of the VPNUK VPN service on Windows 7 machines. L2TP with IPsec is not always stable on Windows 7 systems so not the recommened connection type.
1. Open the Control Panel
First, click on the Start button and click ‘Control Panel’. This opens up the ‘Control Panel Home.’

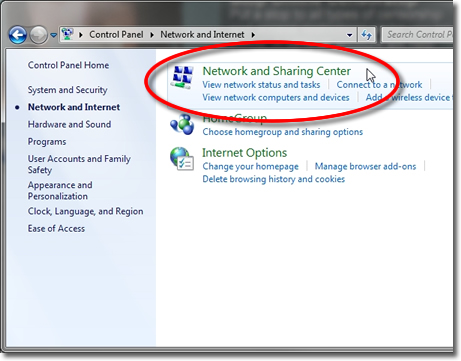
2. Go to the ‘Network and Internet’ panel
Next, click on the ‘Network and Internet’ control panel.

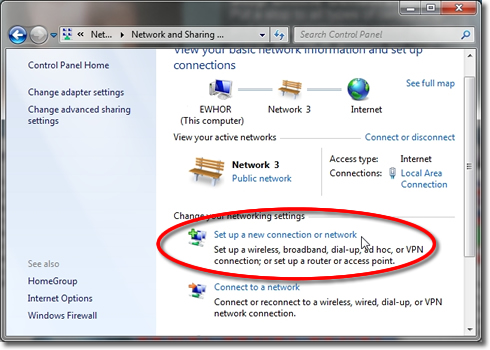
3. Connect To A Network
Next, click on ‘Connect to a network’.
4. Set up the VPN connection
Click on ‘Set up a new connection or Network’.
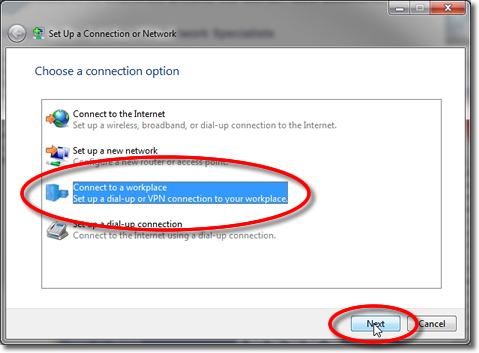
5. Choose the Connection Type
On the next screen, click on ‘Connect to a workplace’ then click ‘Next’.
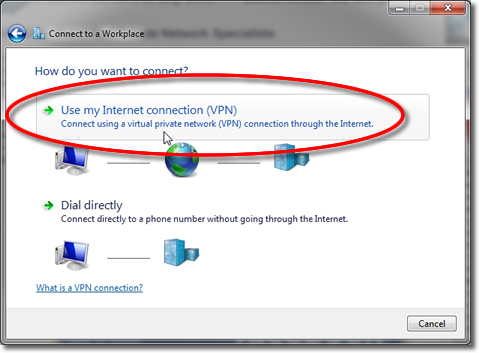
6. Using an Existing Connection
If you are asked if you would like to use an existing connection choose ‘No, create a new connection’ and click ‘Next’.
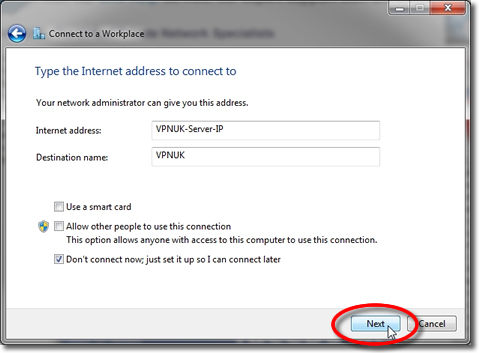
7. Enter the server information
Enter a VPNUK IP Address and ‘Destination name. Ensure that the checkbox labeled ‘Don’t connect now; just set it up so I can connect later’ is checked. Then click the ‘Next’ button. You can find the server information in your ‘Welcome to VPNUK’ email or in the ‘Client CP‘ on the VPNUK website.
8. Enter your username and password
Enter your VPNUK login username and password. Optionally, check the ‘Remember this password’ checkbox, then, click the ‘Create’ button.

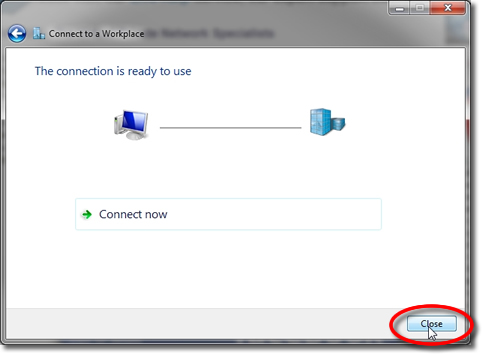
9. Connection Ready
Click the ‘Close’ button to return to the ‘Network and Internet’ screen.
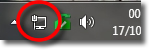
10. Go to the connection
Click onto the active connection in the taskbar and a ‘Currently connect to’ dialog box will appear
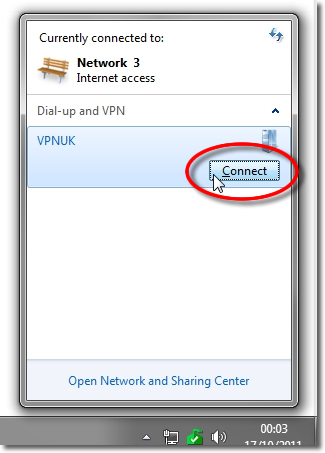
11. Select the connection properties
In the ‘Currently connected to’ screen that has just appeared, you should see the VPNUK.INFO connection that we have set up. Click on the connection and then click onto ‘Connect’.
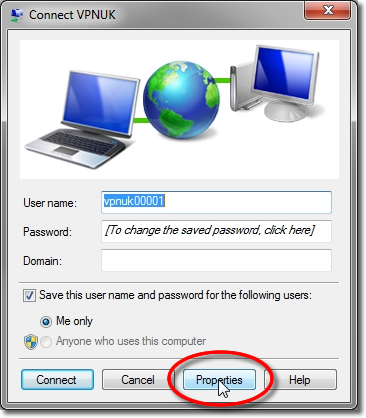
12. Click Properties
The following dialer will appear, click properties once more
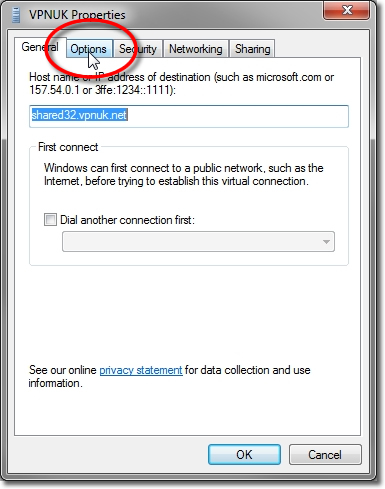
13. Select Options
In the property window, you should see the server you setup ealier, click onto the ‘Options’ tab.
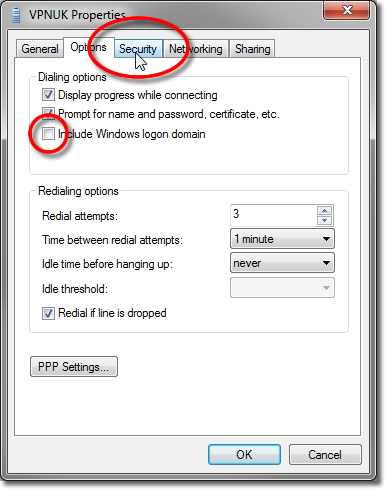
14. Options – Disable Windows Domain.
Remove the tick from the ‘Inlclude Windows logon domain’ dialing options and click onto the ‘Security’ tab.
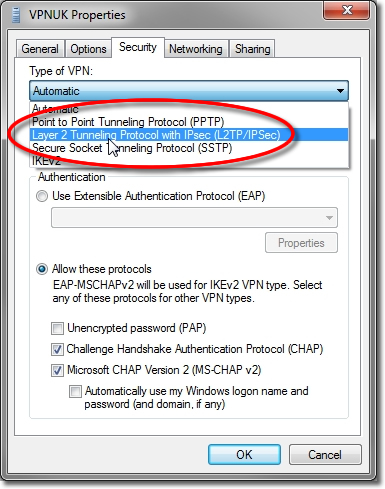
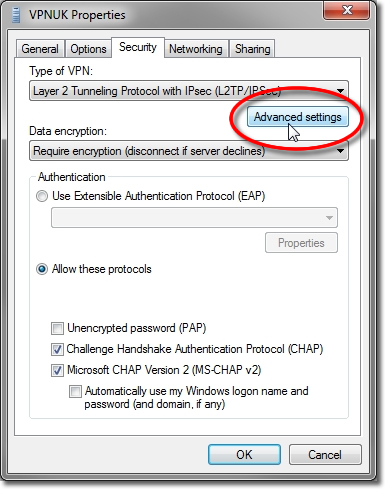
15. Choose The ‘Type of VPN’
From the dropdown menu choose the ‘(L2TP/IPSec)’ option.
16. Advanced Settings
Click onto the ‘Advanced Settings’ button.
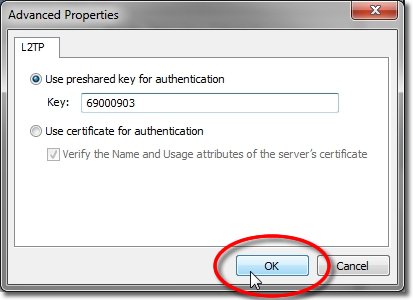
17. Set the Pre shared Key
In the ‘IPsec Settings’ dialog, click the radio button labeled ‘Use pre shared key for authentication’. Then type 69000903 into the text box labeled ‘Key’. Then click the ‘OK’ button.
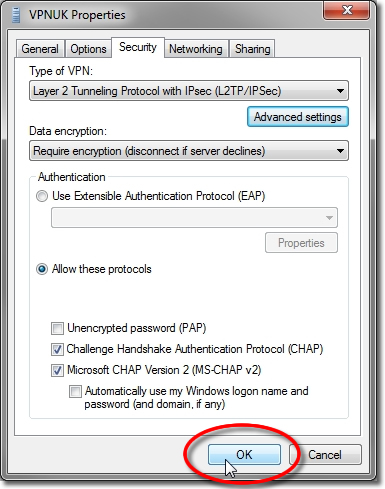
18. Click OK
Click onto the ‘OK’ button to save all the changes and finish the setup configuration.
19. Connecting to VPNUK Servers
Click onto the active conection from the taskbar and choose the VPN connection from the list availiable.
20. Click Connect
Click onto the VPN connection that you would like to connect to.
21. Connect
Click Connect!

Troubleshooting Guide
ISP DNS Hijack / DNS Leak Protection
Some ISPs will attempt to hijack your DNS settings which hinders the VPN connection from functioning correctly. If you find that your VPNUK connection does not route your traffic correctly you can try changing your Public DNS server to the VPNUK DNS server or to an alternative like Google DNS.
1. Right click onto your network connection icon in the sys tray and select ‘Open Network and Sharing Centre’.
2. Go to Change Adapter Settings’ from the left hand menu.
3. Right click onto your active Ethernet or Wireless Connection
and select ‘Properties’.
4. Double click onto ‘TCP/IPv4’ from the list of items.
5. Enter a DNS IP into the DNS server box. Google DNS is 8.8.8.8. VPNUK Public DNS is: 109.169.6.2
Disabling UAC
1. Right click onto the ‘Action Centre’ flag in the sys tray.
2. Select ‘Open Action Centre’.
3. Click onto ‘Change User Account Control Settings’ from the menu on the left.
4. Slide the notification slider to the bottom so its set to ‘Never Notify’.
Note: On Windows Vista uncheck the ‘Use User Account Control’ checkbox.
5. Click ‘OK’.
6. Return to the Action Centre overview and click onto the ‘Change Action Centre Settings’ option from the menu..
7. Uncheck the option to ‘User Account Control’ notification checkbox.
8. Click ‘OK’.
9. Thats it! You have now disabled User Account Control.