Setting up the VPNUK Connection Assistant v10 under Windows XP.
The following tutorial will guide you through the installation and configuration of the VPNUK Connection Assistant v10 on Windows XP machines.
IMPORTANT: In order to avoid any software confilcts please ensure all older or alternative VPN connection software (including OpenVPN) is removed in full from your Windows system before installing our Connection Assistant software.
1. Download the Connection Assistant Software
CLICK HERE to download the latest release of our Connection Assistant software application. If you have any problems downloading or installing files from our server please contact our Live Help team, we are always available to help. Alternative download mirrors are available on our downloads page here.
![]()
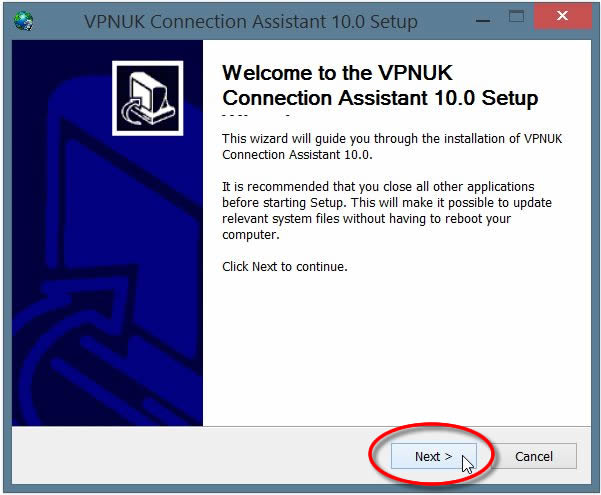
2. Run the Installer
Initiate the installation and click onto the ‘Next’ button.
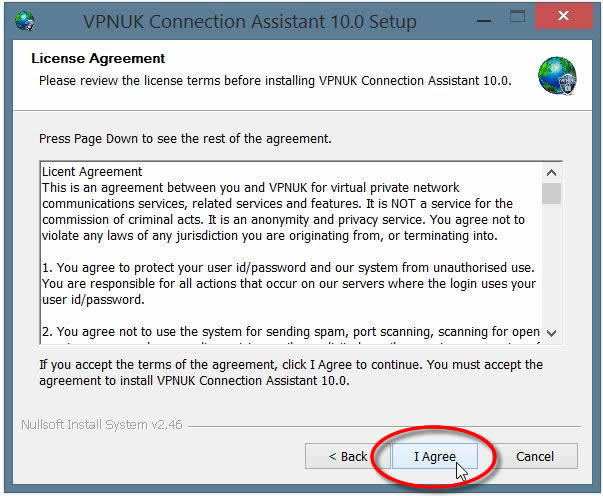
3. License Agreement
Click onto the ‘I Agree’ button.
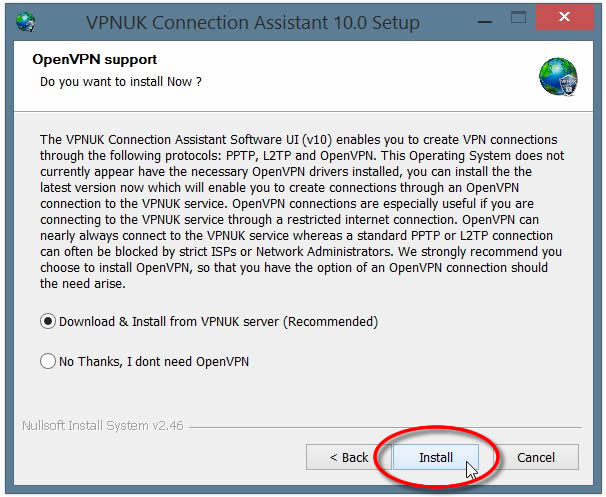
4. OpenVPN Support
Our VPNUK Connection Assistant Software comes with pre-configured OpenVPN support, the installation wizard will automatically detect if you have OpenVPN installed on your system. OpenVPN connections are recommended with the VPNUK service so if you do not already have OpenVPN installed please select the option to Download and Install the latest release from our server.
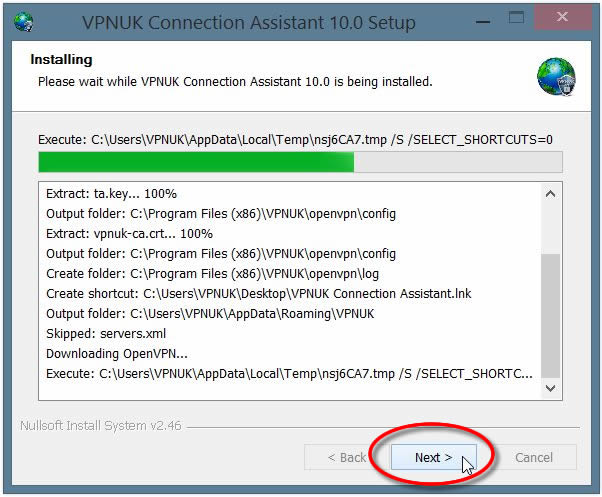
5. Installation Procedure
If you otped for OpenVPN to be installed the application will now be downloaded from our server, once complete the setup wizard will install the software, once complete, click ‘Next’.
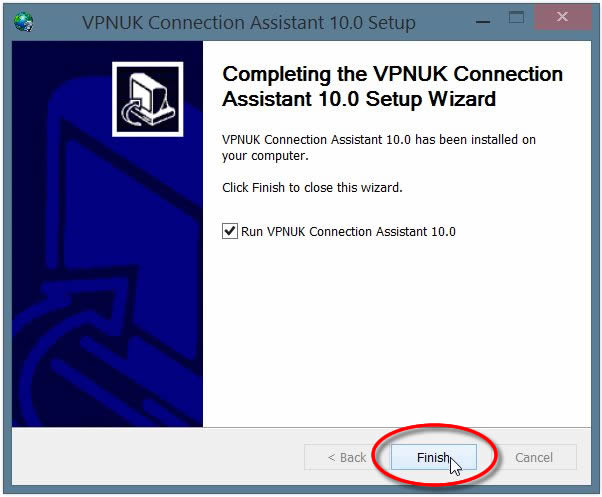
6. Installation Complete
Once the installation is complete click onto the ‘Finish’ button.
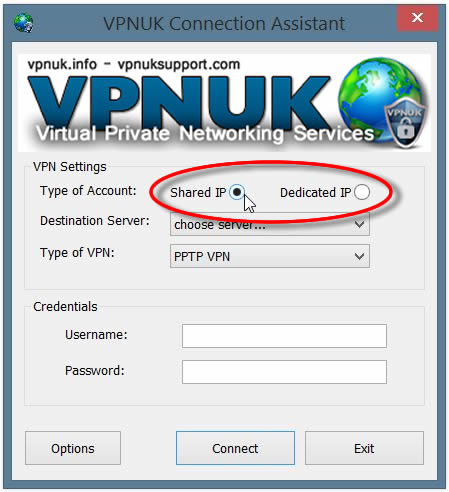
7. Type of Account
Choose the type of account you have with VPNUK.
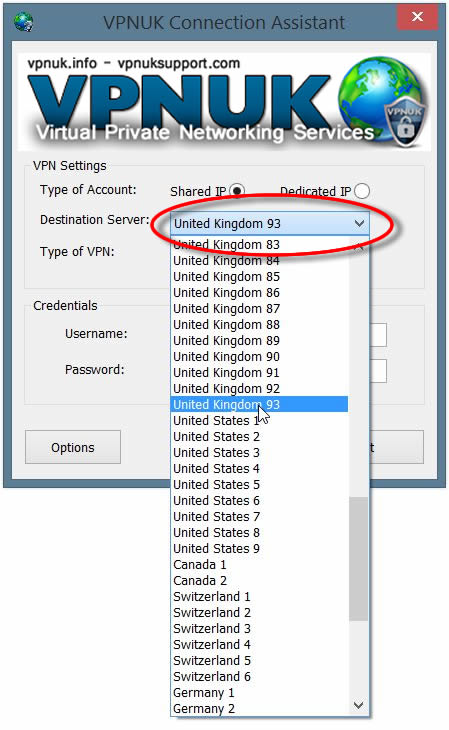
8. Destination Server
Select the ‘Destination Server’ you would like to connect to. If you use the Dedicated IP service, select the corresponding server to where your unique IP is located. If you have an account on our Shared IP platform you can connect to any of the servers listed.
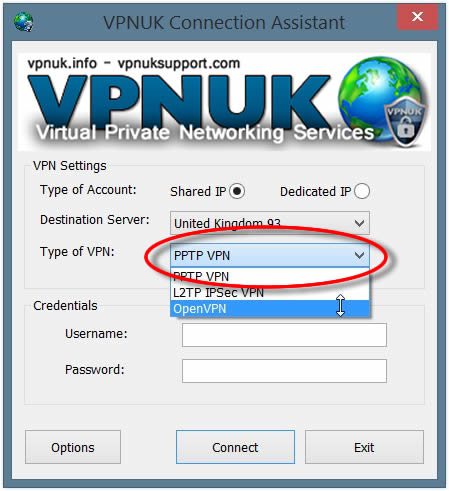
9. Type of VPN
Select the ‘Type of VPN’ connection you would like to use, you have the choice of PPTP, L2TP and the recommended connection type OpenVPN.
10. Login Username and Password
Enter your login username and password into the ‘Username’ and ‘Password’ input fields.
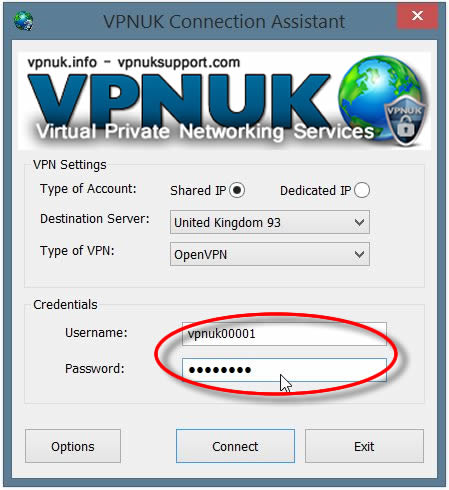
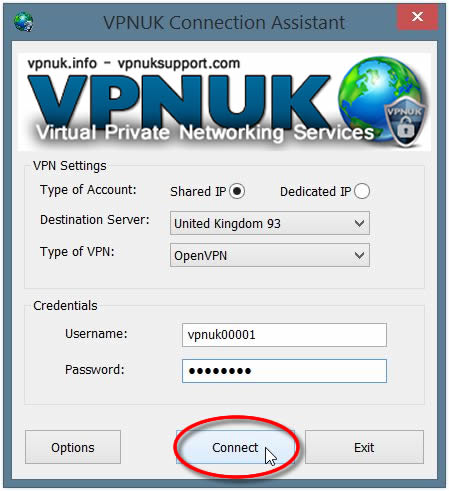
11. Connection Ready – Connect
Click onto the ‘Connect’ button to connect to the VPNUK service.
Note: Whilst the VPNUK software is running you will see our ‘Shield’![]() icon in your sys tray (by the clock), this will change and display our ‘Shield and Padlock’
icon in your sys tray (by the clock), this will change and display our ‘Shield and Padlock’![]() once the VPN is connected.
once the VPN is connected.
Optional Settings & Troubleshooting
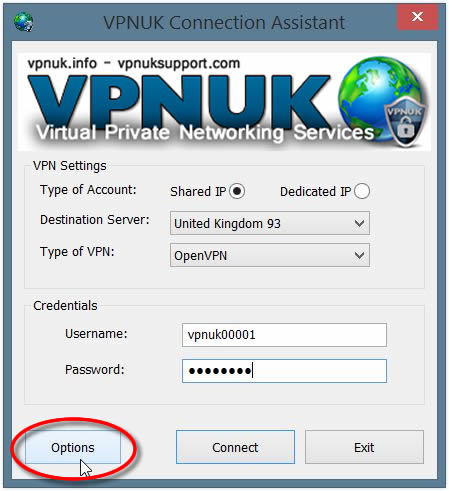
1. Options
The VPNUK Connection Assistant software application comes with many custom configuration options and troubleshooting settings. If you have any problems with the software or require custom configuration settings click onto the ‘Options’ button.
2. General Options
From the ‘General’ options you can choose to start the software when your computer starts, connect automatically and reconnect should you lose your connection plus some other PPP and Security options designed for PPTP and L2TP connections. If you would like to set custom parameters on your OpenVPN connection click onto the ‘OpenVPN’ tab.
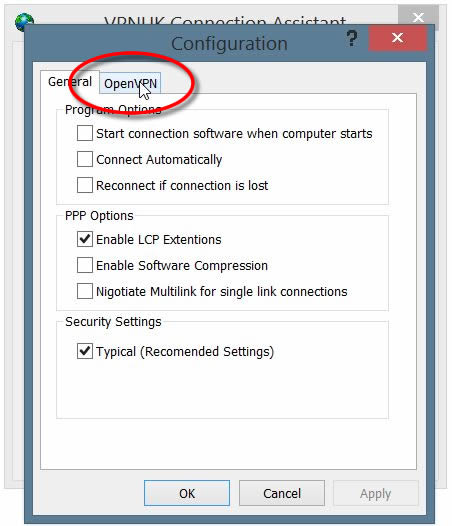
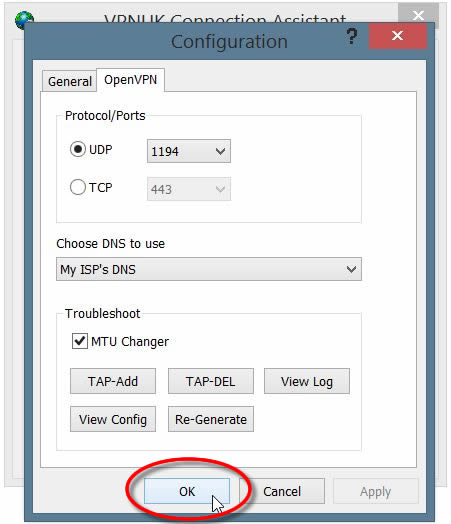
3. OpenVPN Options & Troubleshooting
There are many custom configurations possible with OpenVPN connections. You can choose the Protocol, Port, DNS and MTU level to use on your connection. More information for these settings is available in our OpenVPN setup tutorial.
Troubleshooting Guide
ISP DNS Hijack / DNS Leak Protection
Some ISPs will attempt to hijack your DNS settings which hinders the VPN connection from functioning correctly. If you find that your VPNUK connection does not route your traffic correctly you can try changing your Public DNS server to the VPNUK DNS server or to an alternative like Google DNS.
1. Right click onto your network connection icon in the sys tray and select ‘Network Connections’.
2. Right click onto your active Ethernet or Wireless Connection
and select ‘Properties’.
3. Double click onto ‘TCP/IP’ from the list of items.
4. Enter a DNS IP into the DNS server box. Google DNS is 8.8.8.8. VPNUK Public DNS is: 109.169.6.2