Setting up a Web Proxy connection on the VPNUK servers.
Basic Setup Instructions
Firefox Setup
Internet Exporer Setup – Windows
Google Chrome Setup – Windows
Safari Setup – Windows
Mac OSX Setup
Linux Setup
Apple iPhone – iPad – iPod Touch Setup
If you do not require the additional security of a VPN connection you are able to connect to your VPNUK account through a standard web browser proxy service over a choice of ports. We have enabled the Proxy Service on all VPNUK servers. As with our VPN service, clients on our Shared IP accounts are always provided with a randomly assigned Dynamic IP address when connected to the VPNUK servers. Clients on our specially designed Dedicated IP accounts are always assigned their totally unique, static IP address.
We launched the Proxy Service after continual requests from clients looking for a simplified service that works with the more normal day to day services like Facebook, You Tube and GMail from coutries that restrict access to these services. Some streaming media services like the BBCiPlayer and ITV Player in the UK along with services like FOX and NBC in the USA also work from behind the proxy service. Unfortunately due to the limitations of the web proxy service it is not possible to use services that require traffic to be run through a TCP/IP protocol, services which require that kind of configuration are VoIP services like Skype, and VoIP Stunt, P2P services like Bit Torrent and some streaming media services like Zattoo, Voddler, Hulu and All4.
Setting up the Proxy service is simple, quick and very easy to customise to your specific requirements, you are able to run custom commands and also route specific traffic outside the proxy server.
Basic Setup Instructions
1. Go to your network overview and select the option for creating a web proxy.
2. Enter the VPNUK proxy server, you have te choice of
UK: proxy-uk.vpnuk.net
USA: proxy-us.vpnuk.net
Swiss: proxy-ch.vpnuk.net.
3. Enter the Proxy port, you can use any of these ports: 8080, 3128 or 54321
4. Save the settings
5. Enter your VPNUK login username and Password when prompted.
6. You should now be connected to the VPNUK Proxy service.
Screenshot Tutorials
Firefox
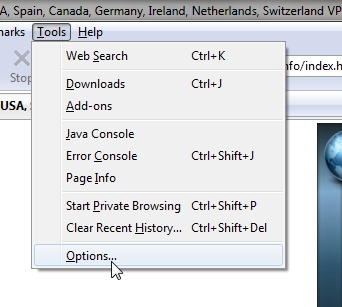
1. Go to Tools -> Options in Firefox
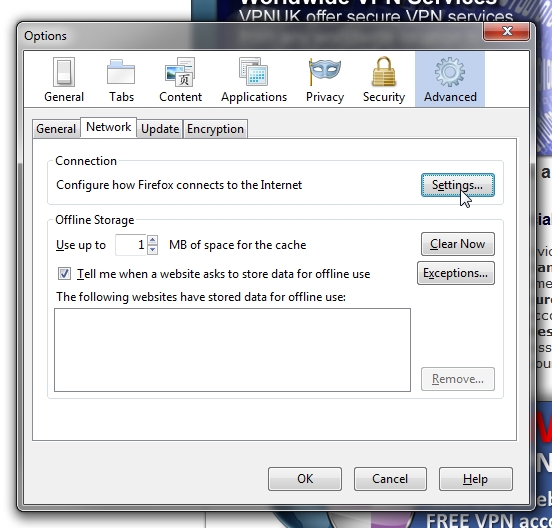
2. Go to Advanced -> Network -> Settings
3a. Select ‘Manual Proxy configuration
3b. Enter your VPNUK Server Address: proxy-uk.vpnuk.net, proxy-us.vpnuk.net or proxy-ch.vpnuk.net
3c. Enter the port, the VPNUK proxy service listens on ports 3128, 8080 or 54321
3d. You can choose to use the proxy for all protocols or just browser traffic.
3e. If you would like to access certain websites without the proxy, enter their details into the ‘No proxy for’ text area.
3f. Click ‘OK’

4. Click ‘OK’

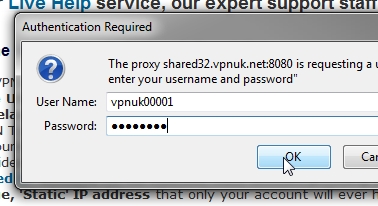
5. Navigate to a website and enter the VPNUK login username and password when prompted, then click ‘OK’
6. Thats It!
Screenshot Tutorials
Internet Explorer / Google Chrome / Safari
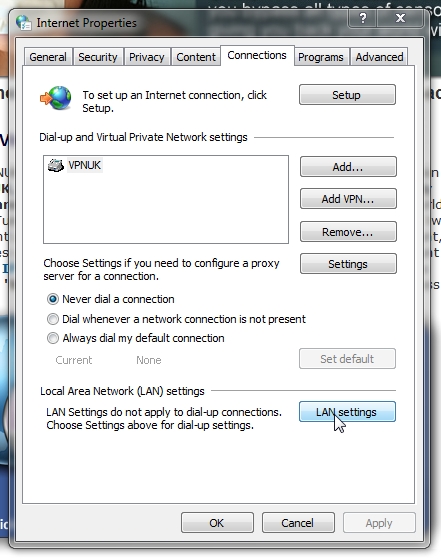
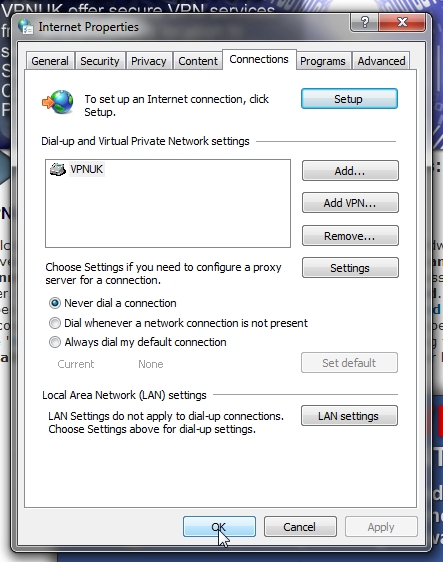
1. Go to ‘Start’ -> ‘Control Panel’ -> ‘Internet Options’.
2. Go to the ‘Connections’ tab and click onto the ‘LAN Settings’ button.
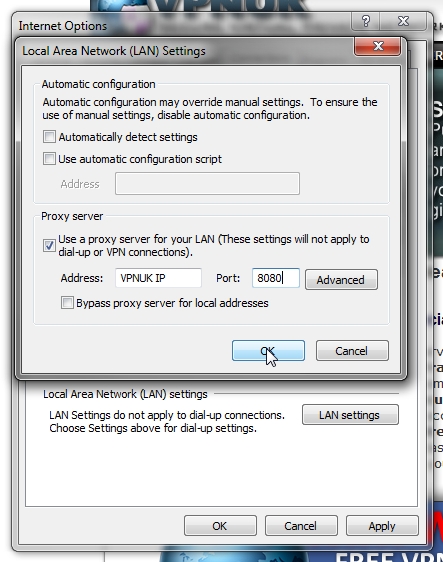
3a. Place a check in the ‘Use Proxy server for your LAN’ checkbox.
3b. Enter your VPNUK Server Address: proxy-uk.vpnuk.net, proxy-us.vpnuk.net or proxy-ch.vpnuk.net
3c. Enter the port, the VPNUK proxy service listens on ports 3128, 8080 or 54321.
3d. Click ‘OK’.
4. Click ‘OK’.
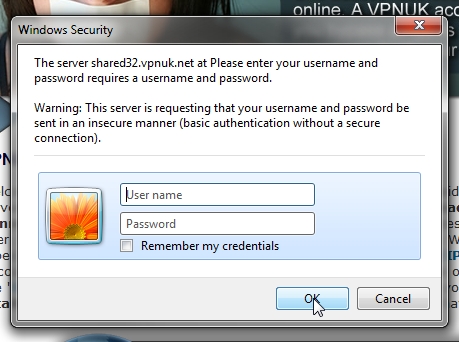
5. Navigate to any webpage and enter your VPNUK ‘username’ and ‘password’ when prompted then click ‘OK’.
6. Thats It!
Screenshot Tutorials
Mac OSX
1. Open the ‘Network Preferences’ overview.

2. Select your active internet connection from the available connections list and then click onto the ‘Advanced’ button.

3a. Select the Proxy services you would like to configure.
3b. Enter the VPNUK Server Address: proxy-uk.vpnuk.net, proxy-us.vpnuk.net or proxy-ch.vpnuk.net
3c. Enter the port, the VPNUK proxy service listens on ports 3128, 8080 or 54321.
3d. Enter the login username and password for your VPNUK account.
3e. Click ‘OK’.

4. Thats It!
Screenshot Tutorials
Linux – Ubuntu Synaptic Manager
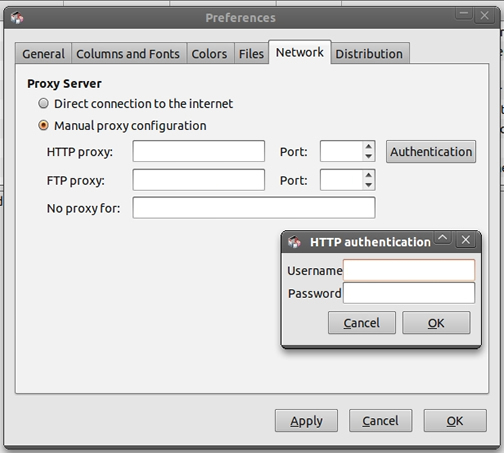
1a. Select the ‘Manual Proxy Configuration’ checkbox.
1b. Enter the VPNUK Server Address into the HTTP Proxy (and FTP): proxy-uk.vpnuk.net, proxy-us.vpnuk.net or proxy-ch.vpnuk.net.
1c. Enter the port, the VPNUK proxy service listens on ports 3128, 8080 or 54321.
1d. Click the ‘Authentication’ button and enter your login username and password.
1e. Click ‘OK’.
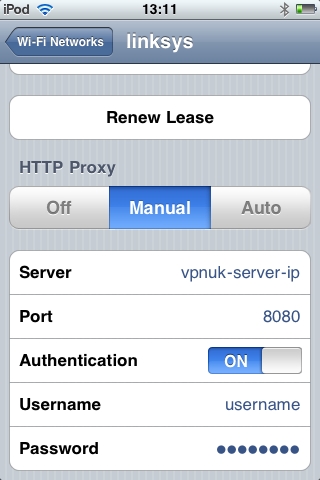
Apple iPhone – iPad – iPod Touch
1a. Go to the Active internet connection settings.
1b.
Under HTTP Proxy select ‘Manual’.
1c. Enter the VPNUK Server Address: proxy-uk.vpnuk.net, proxy-us.vpnuk.net or proxy-ch.vpnuk.net
1d. Enter the port, the VPNUK proxy service listens on ports 3128, 8080 or 54321.
1e. Slide ‘Authentication’ to ‘On’
1f. Save the Settings.
[END]