DNS Leak Protection.
ISP DNS Hijack / DNS Leak Protection
Some ISPs will attempt to hijack your DNS settings which hinders the VPN connection from functioning correctly. If you find that your VPNUK connection does not route your traffic correctly you can try changing your Public DNS server to the VPNUK DNS server or to an alternative like Google DNS.
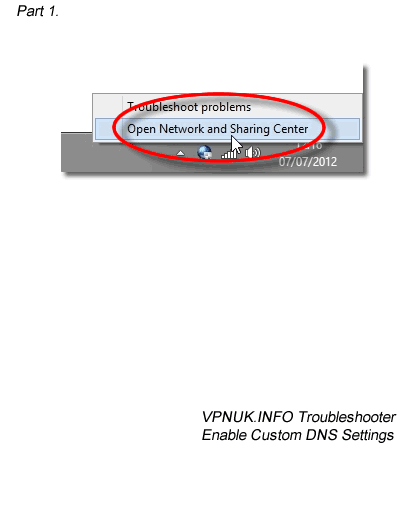
1. Right click onto your network connection icon in the sys tray and select ‘Open Network and Sharing Centre’.
2. Go to ‘View Network Adapters’ from the left hand menu.
3. Right click onto your active Ethernet or Wireless Connection
and select ‘Properties’.
4. Double click onto ‘TCP/IPv4’ from the list of items.
5. Enter a DNS IP into the DNS server box. Google DNS is 8.8.8.8. VPNUK Public DNS is: 109.169.6.2