Setting up IKEv2 VPN access through Blackberry Z10 and Blackberry Q10 Mobile Phones.
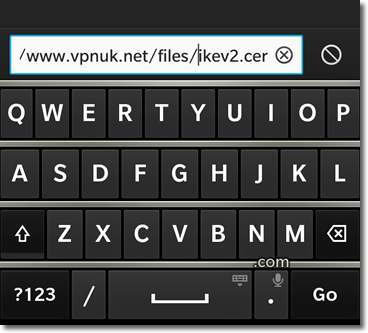
1. Download the Certificate file
Download our Blackberry certificate file directly to your handset Click here to download our certificate file.
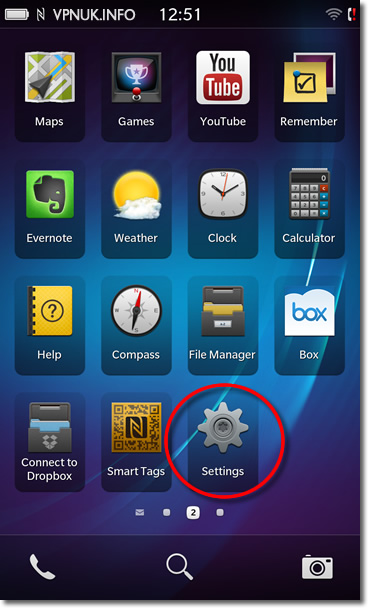
2. Blackberry Settings
Click onto the settings icon on your Blackberry
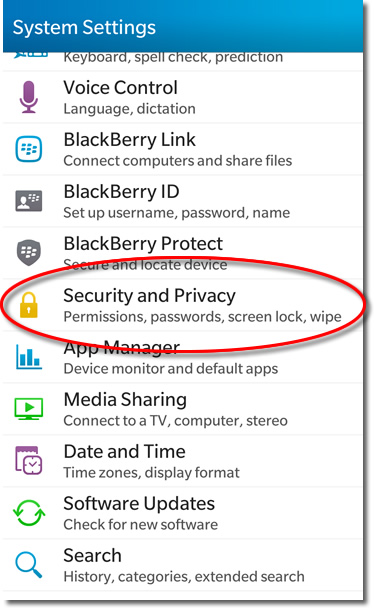
3. Security & Privacy
Go to ‘Security and Privacy’ from the list of System Settings.
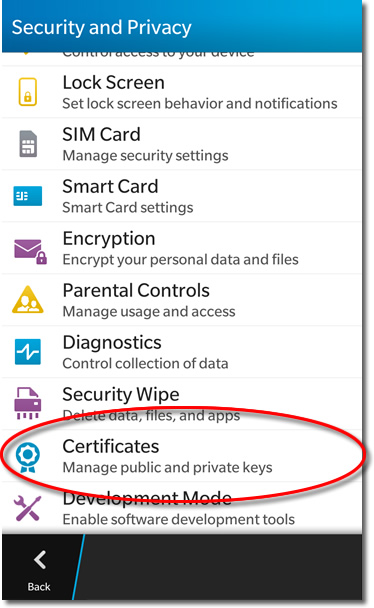
4. Certificates
Click onto the ‘Certificates’ location.
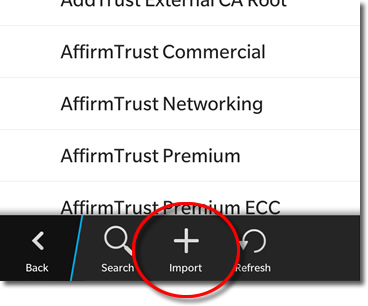
5. Import
Click onto the ‘Import’ icon.
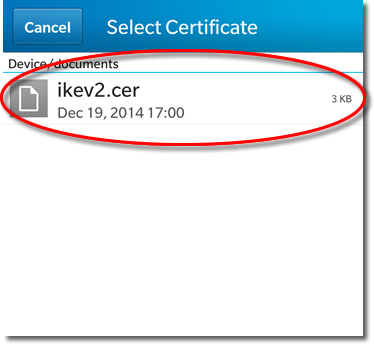
6. Select certificate
Select the certificate you downloaded earflier.
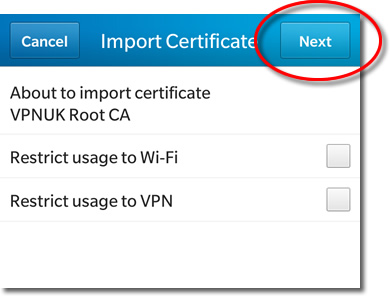
7. Confirm
Confirm the import by clicking onto the ‘Next’ button.
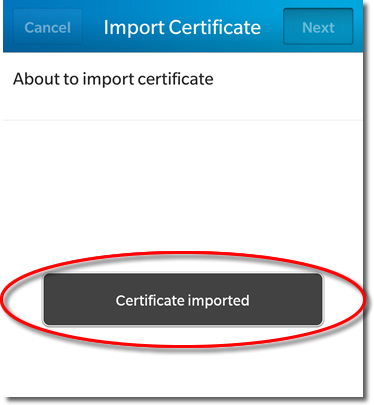
8. Confirmation
You will receive a ‘Certificate Imported’ confirmation if the install is successful.
9. View Certificate
You should now be able to see the ‘VPNUK Root CA’ certificate in your certificate store.

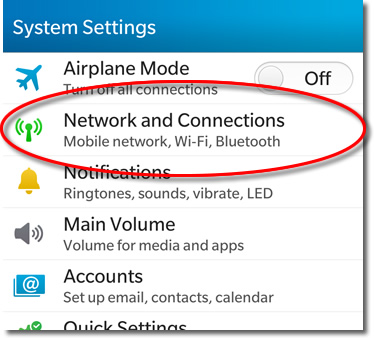
10. Network and Connections
Go back to ‘Network and Copnnections’ from the system settings menu.
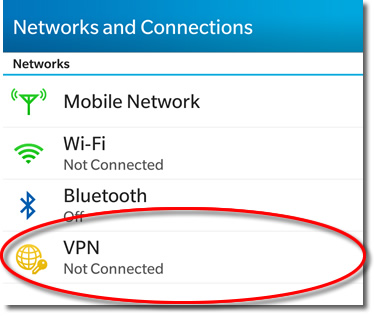
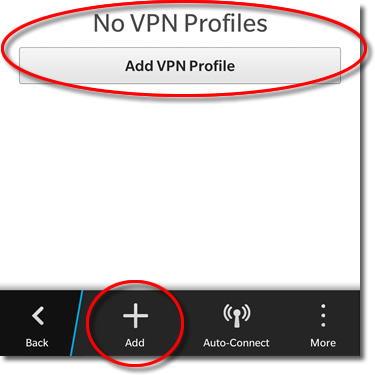
11. VPN
From the list of Networks select the option for ‘VPN’.
12. VPN Profile
Select ‘Add VPN Profile’.
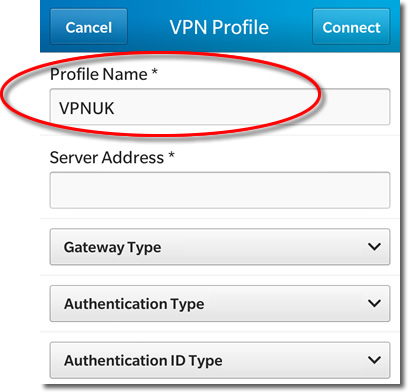
13. Profile Name
Enter any ‘Profile Name’.
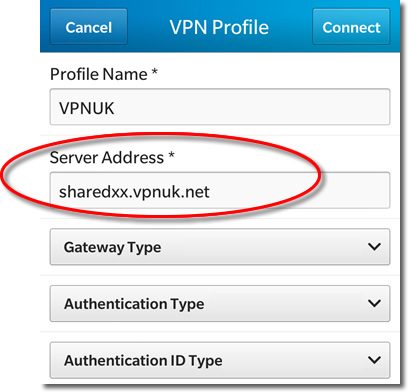
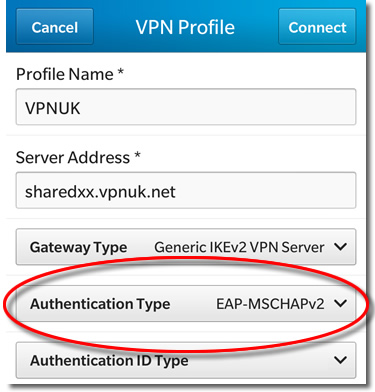
14. Server Address
Enter your chosen ‘Server. You can find the server address in your ‘Welcome to VPNUK’ email and also in your client control panel on the VPNUK website.
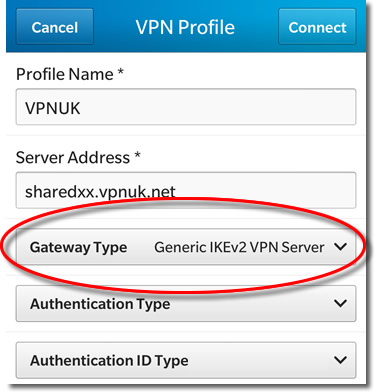
15. Gateway Type
Enter the Gateway Type as ‘Generic IKEv2 VPN Server’.
16. Authentication Type
Enter the Authentication Type as ‘EAP-MSCHAPv2’.
17. Authentication ID Type
Enter the Authentication ID Type as ‘Email Address’.
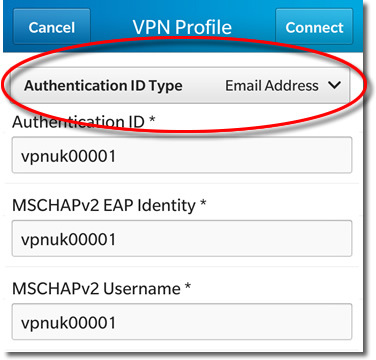
18. Username
Enter your VPNUK login username into all three of the ‘Authentication ID, MSCHAPv2 EAP Identity and MACHAPv2 Username’ fields.
19. Password
Enter your VPNUK Password into the ‘MSCHAPv2 Password’ field.
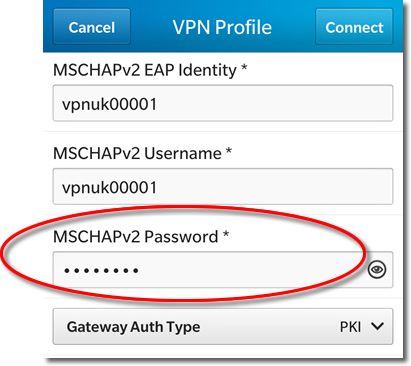
20. Gateway Auth Type
Enter the Gateway Auth Type as ‘PKI’.
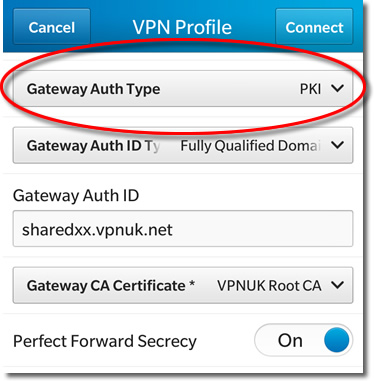
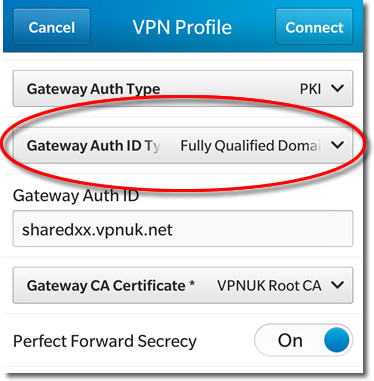
21. Gateway Auth ID Type
Enter the Gateway Auth ID Type as ‘Fully Qualified Domain Name’.
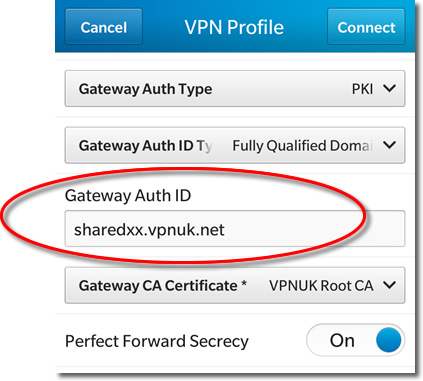
22. Gateway Auth ID
Enter the same server address as you entered into the ‘Server Address’ field as the ‘Gateway Auth ID ‘.
23. Certificate
Choose the Gateway CA Certificate ‘VPNUK Root CA’.

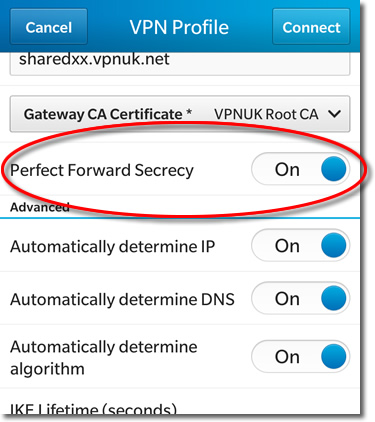
24. Secrecy
Toggle the ‘Perfect Forward Secrecy’ to ‘On’.
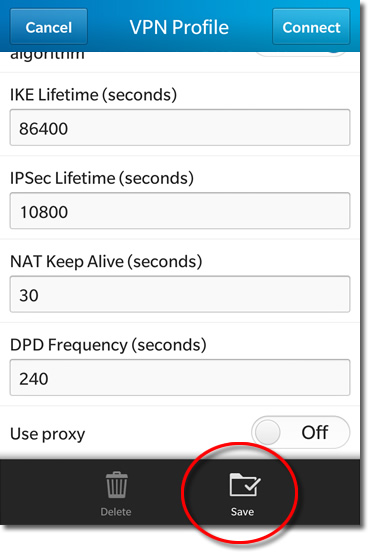
25. Save Profile
Click onto the ‘Save’ icon.
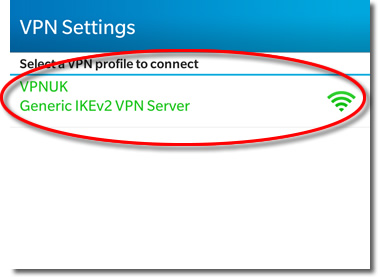
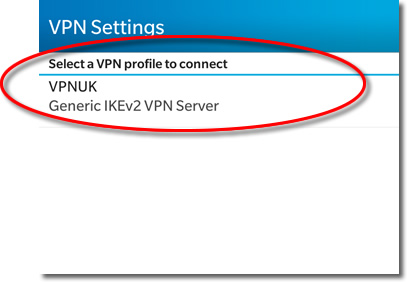
26. Connect to VPNUK
Click onto the newly created VPNUK connection to connect to the VPN.
27. Connected!
You should now be connected to the VPNUK Service.